
Run Vehicle Routing Problem
Before running Network Analysis, please ensure the road layer has been converted to network data, so you can choose such network data in layer format in Network drop-down menu on the Network Analyst toolbar and so does the Network Analyst menu. To convert road layer to network data, please refer to Network Data.

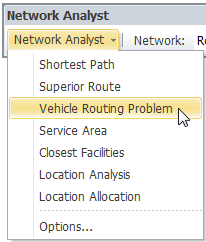
1.Open Network Analyst toolbar, click Network Analyst and select Vehicle Routing Problem.
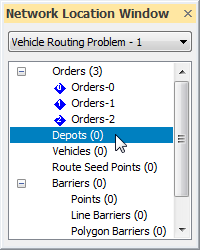
2. Select Orders on Network Location Window. For more details about Orders/ Depots settings and explanations , please look up the Network Analysis Element chapter.

3. Click Add Network Location on Network Analyst toolbar and mouse-click on the map to add the orders.

4.Select Depots on Network Location Window.
5. Click Add Network Location on Network Analyst toolbar and mouse-click on the map to add the depots.
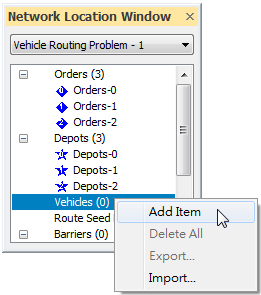
6. In Network Location Window, select Vehicles and right-click on it and select Add Item to increase the vehicles. For more details about vehicles settings and properties, please check the Set Vehicle chapter.
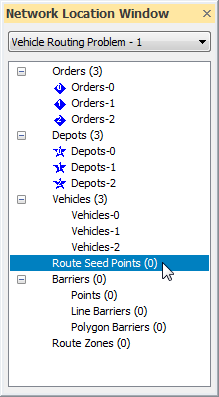
7. In Network Location Window, select Route Seed Points. For more details about Route Seed Points settings and properties, please check the Set Route Seed Points chapter.
8. Click Add Network Location on Network Analyst toolbar and mouse-click on the map to add the route seed points.
9. After all network locations are added up on the map, you can select “Point”, “Line Barriers” or “Polygon Barriers” in Network Location Window and click Add Network Location on the Network Analyst toolbar to add the barriers on the map, if necessary.
10. Besides, if you need to constrain the range for Vehicle Routing Problem, please select Route Zones and click Add Network Location on the toolbar to draw a closed area, so the network locations outside this area will not be considered in the solution.
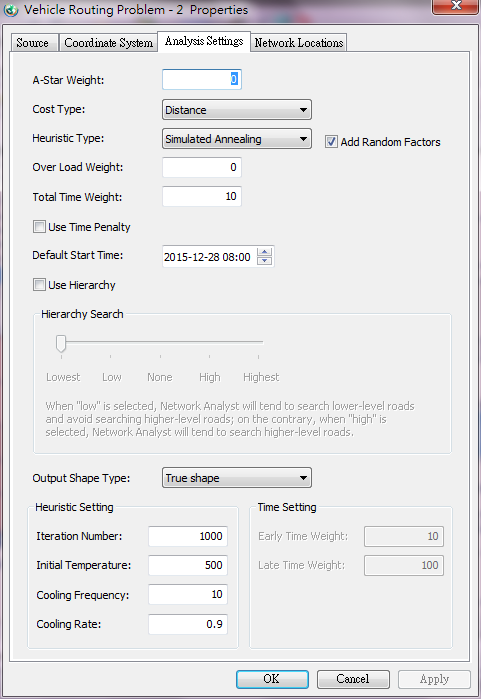
11. Set the analysis. Right-click on the Vehicle Routing Problem in the Layers, and click Properties... . Switch to the Analysis Settings tab, where you can set up the A-Star Weight; Cost Type, whether to Use Hierarchy, etc. If you want to learn more in analysis settings, please check the properties chapter.
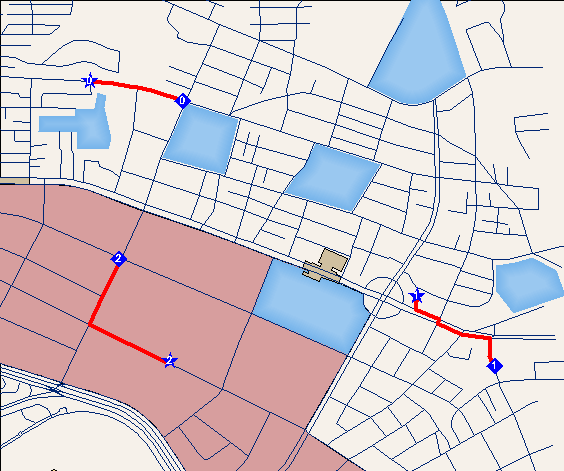
12. After all settings are finished, please click Solve on the Network Analyst toolbar.

13. The analysis result will be displayed on the map(the red lines refer the result route for Vehicle Routing Problem) if it has one.
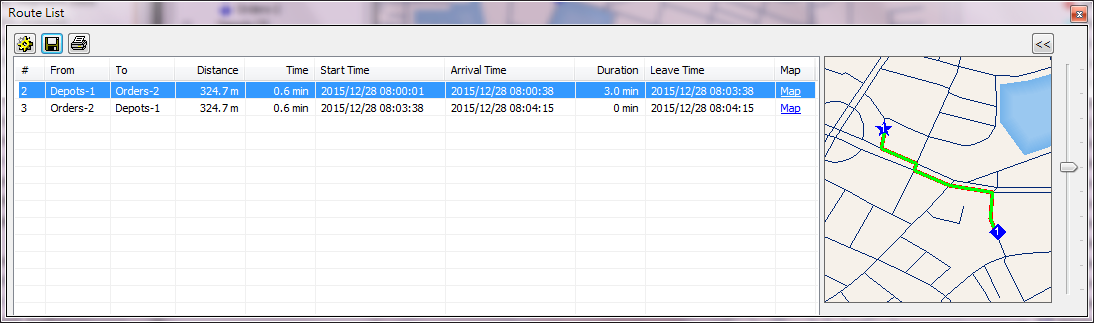
14. Or you can click the direction window and view the detailed route result in the “Route List.”

©2016 Supergeo Technologies Inc. All rights reserved.