
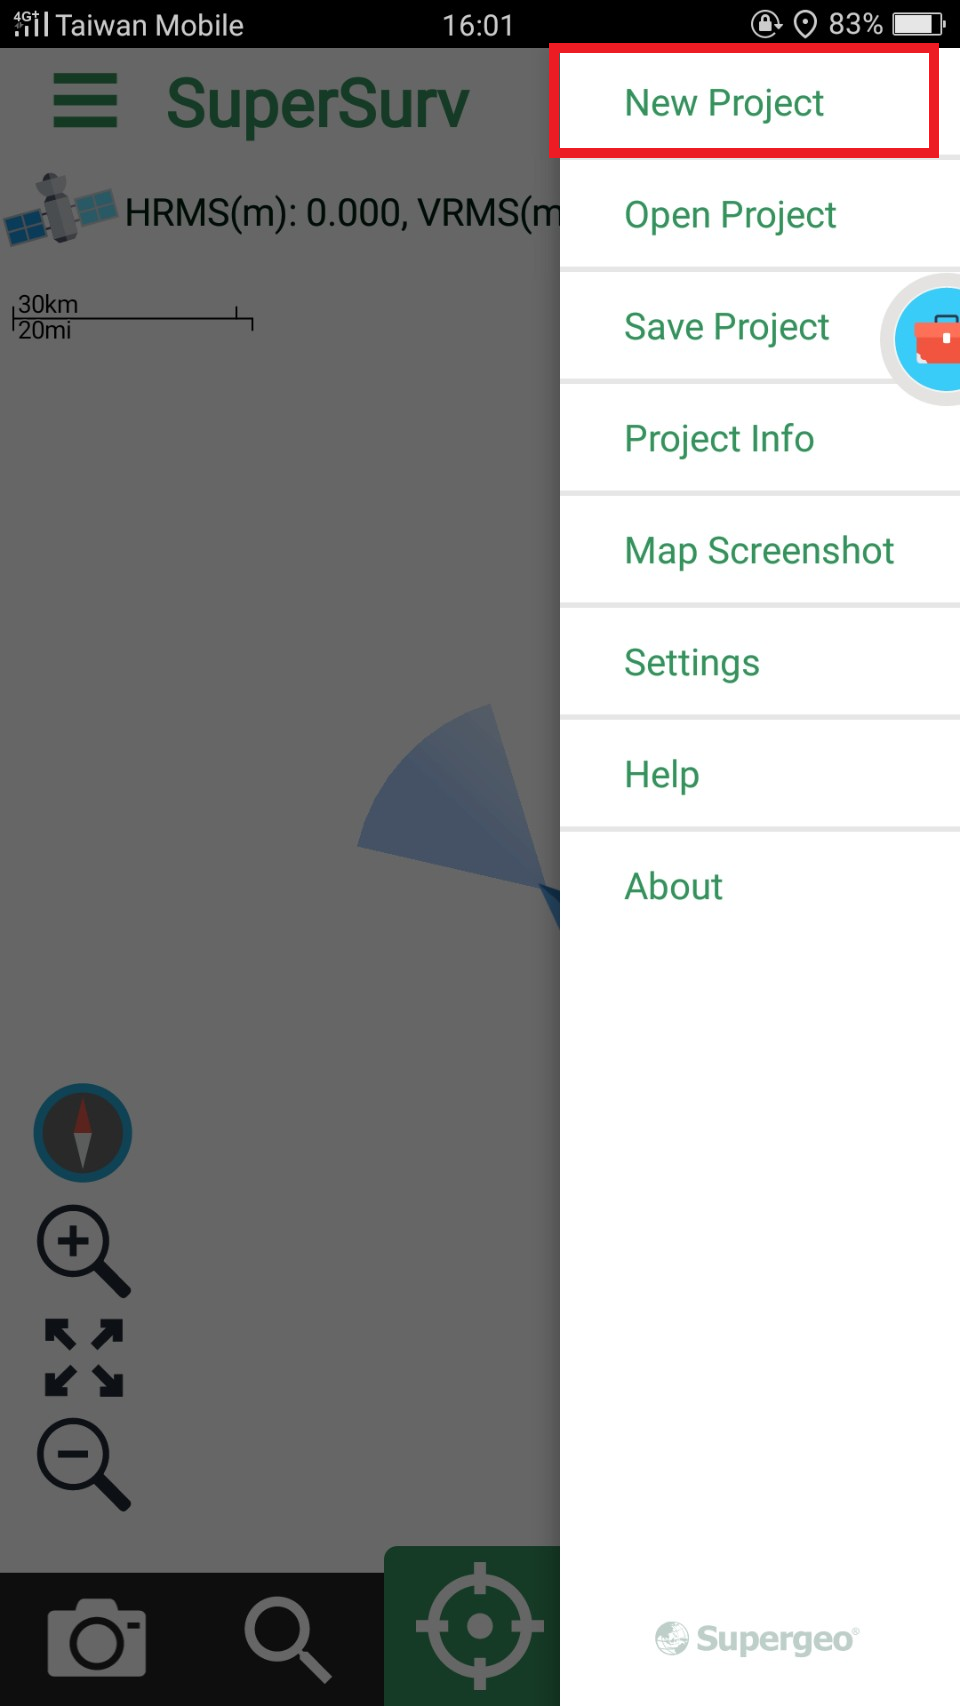
Creating a New Project
SuperSurv works with a project environment. All the layers, track files, photos generated by SuperSurv are saved in a project environment, while all the settings of projects are saved in SPP project file. When you start SuperSurv for the first time, the system will ask whether to create a project file. If SuperSurv has been used, as the system starts, you can tap uper-right bottom on the mobile device > Create a new project to build a new project environment. To create a project with Online Map Tool please refer to Online Map Tool Project.

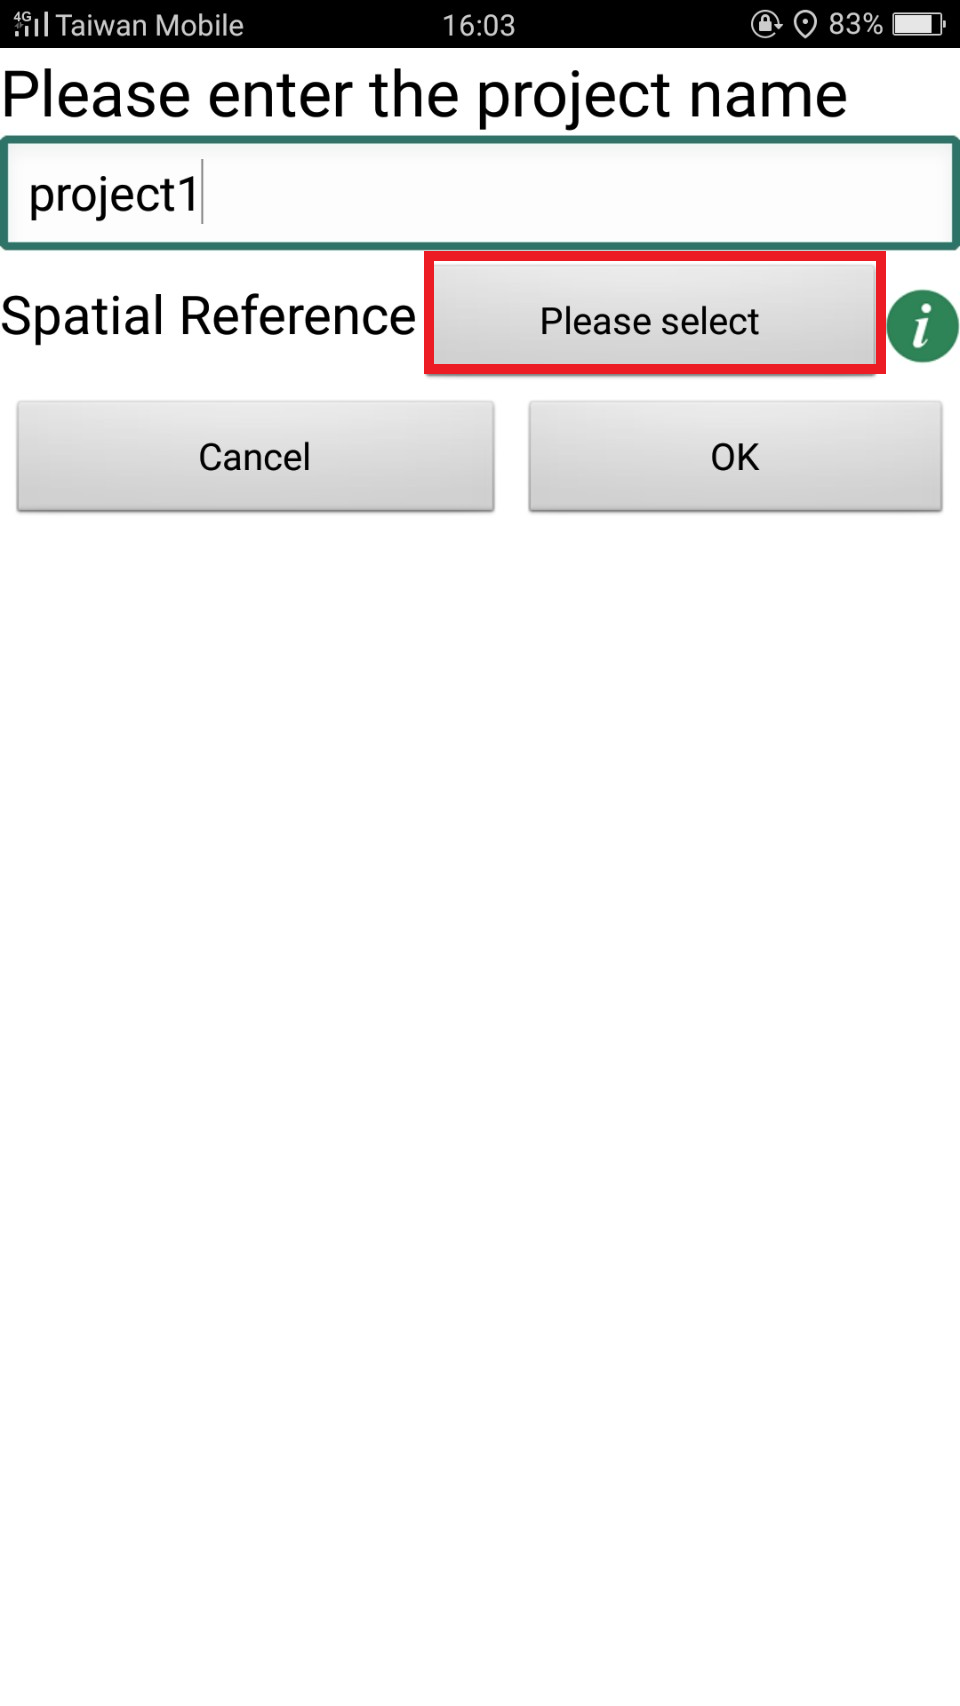
To create a new project, you need to name the project and set the spatial reference. What should be noted is that project name and spatial reference cannot be modified after being set. Tap “Please select” to set spatial reference.
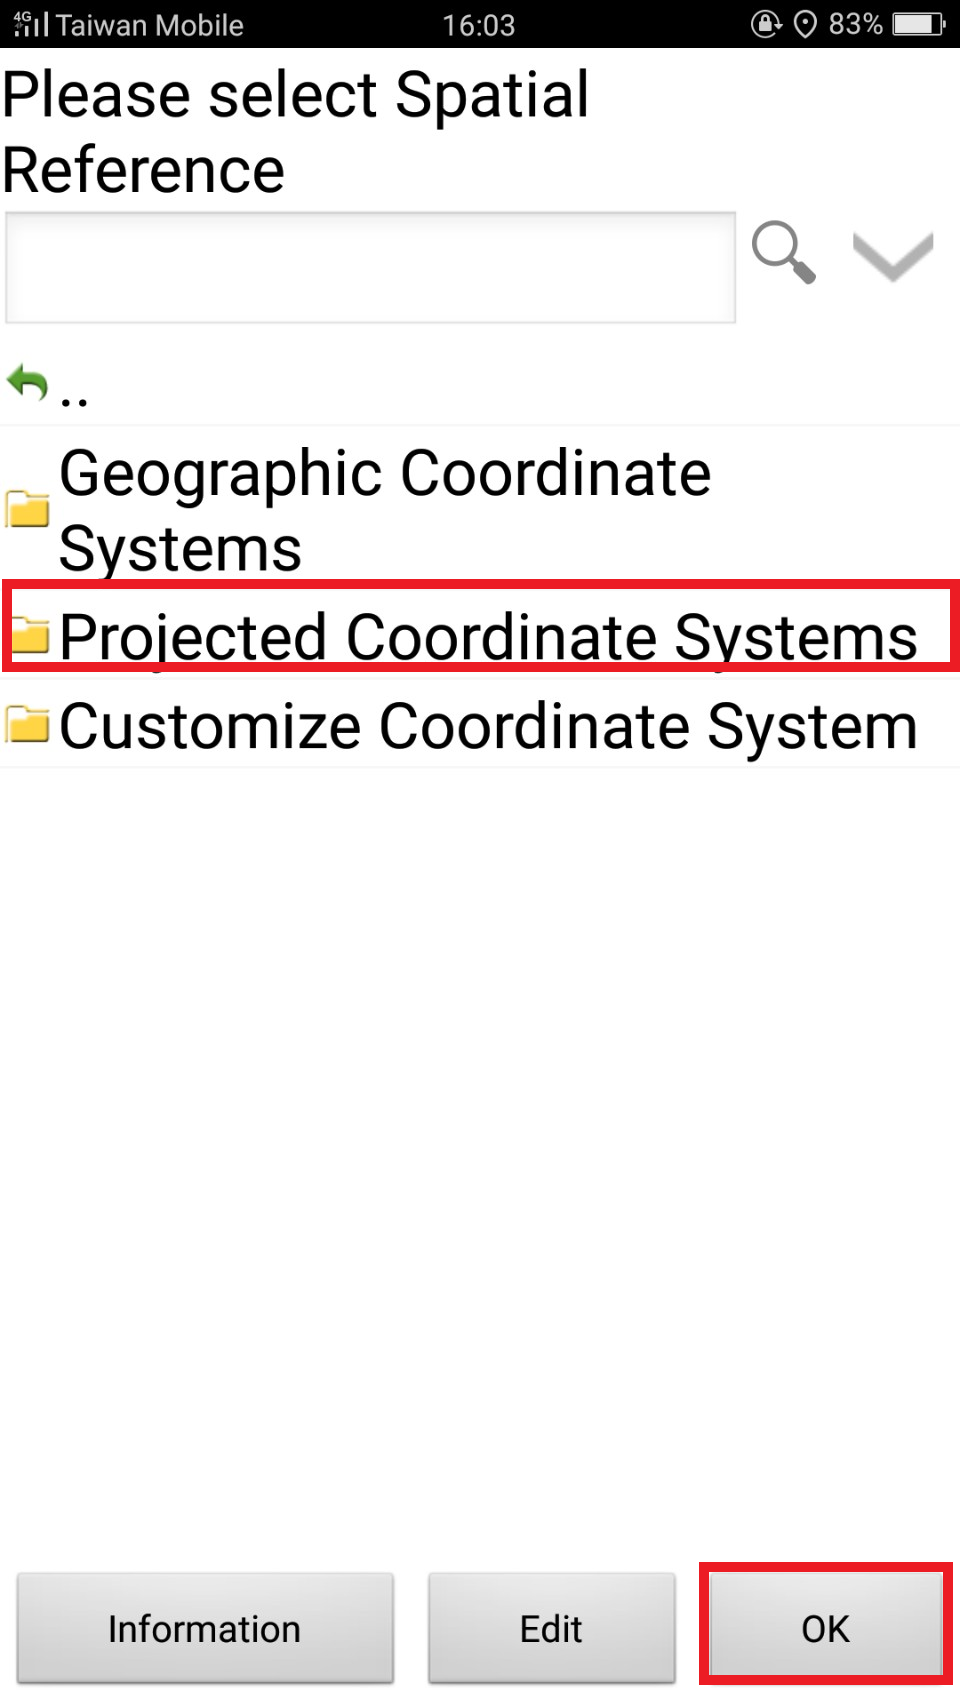
The coordinate systems provided by spatial reference include geographic coordinate systems and projected coordinate systems. In addition, users can also build customized coordinate system by importing PRJ file. Please choose the coordinate system you need and click OK.
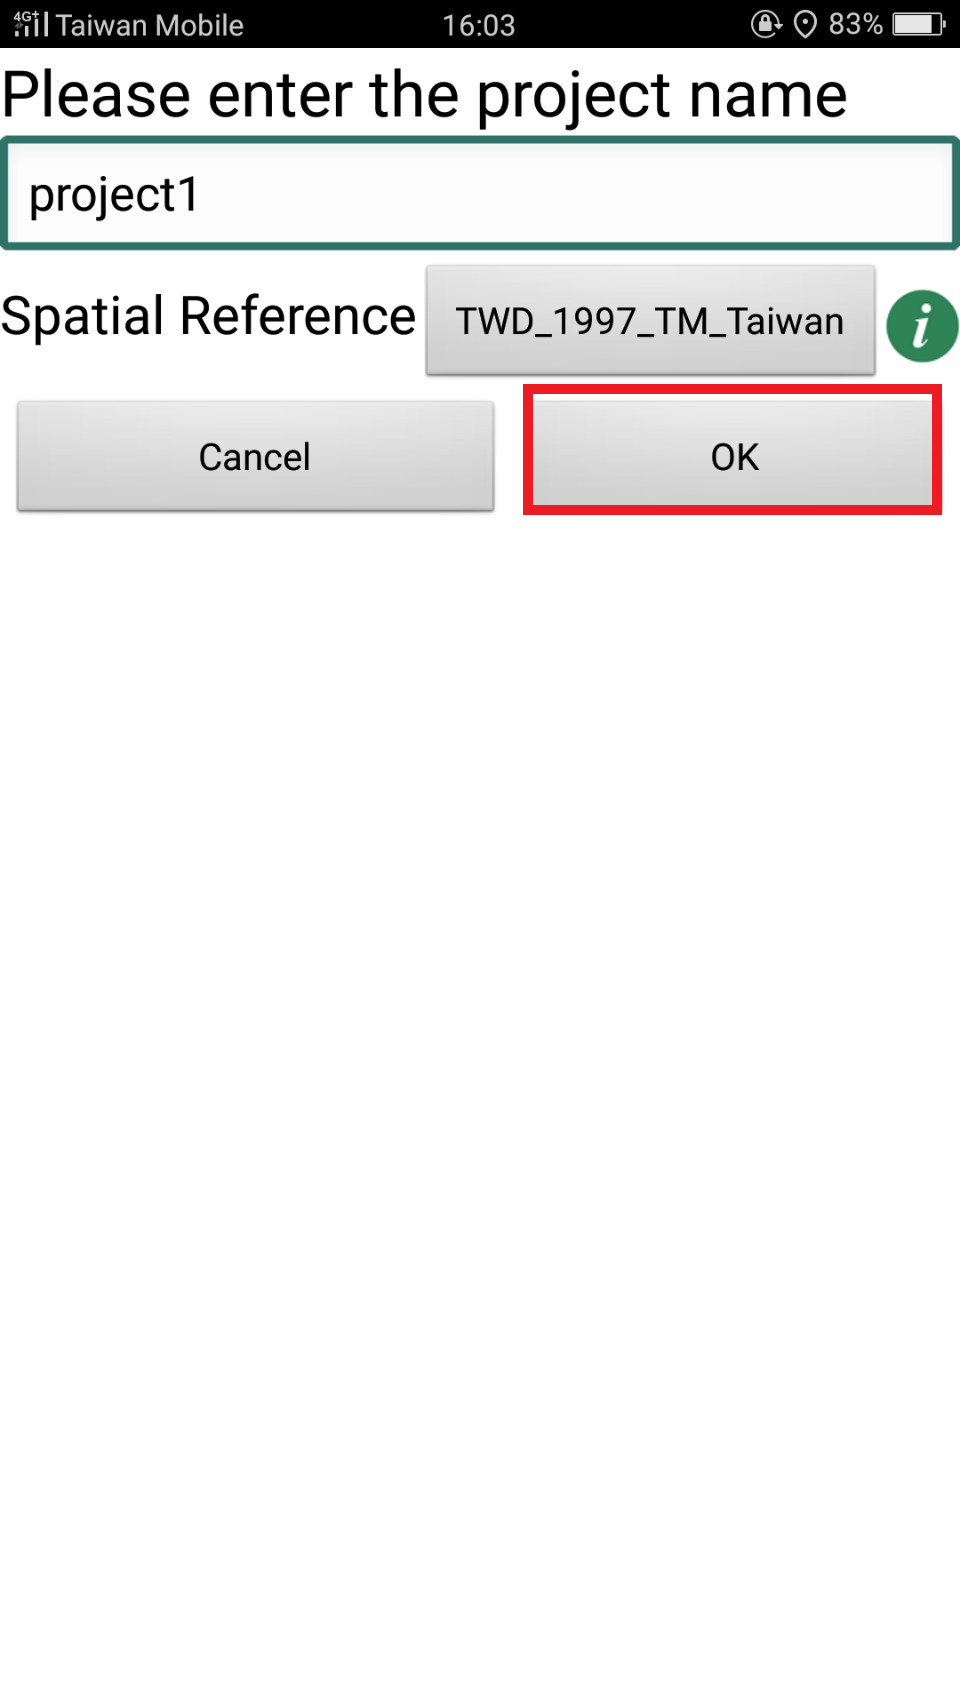
As the project is created successfully, the system shows up.
SuperSurv supports to use GIS vector layers, including GEO and SHP file format. The way to create a new layer, please refer to Creating a New Layer. Besides, you can add a SGT basemap or a STC basemap to enrich the map. The way to generate STC basemap please refer to SuperGIS Desktop or SuperGIS Server User Guide. About the way to add the two kinds of base maps, please refer to Adding SGT Base Map or STC Base Map.
As you build a project environment successfully, a folder, SuperSurv, will be built directly in sdcard. The folder contains a folder named after the project to save the files related to the project and a Template folder. For example, the project name is “project 1”, and the project folder is named after the project.
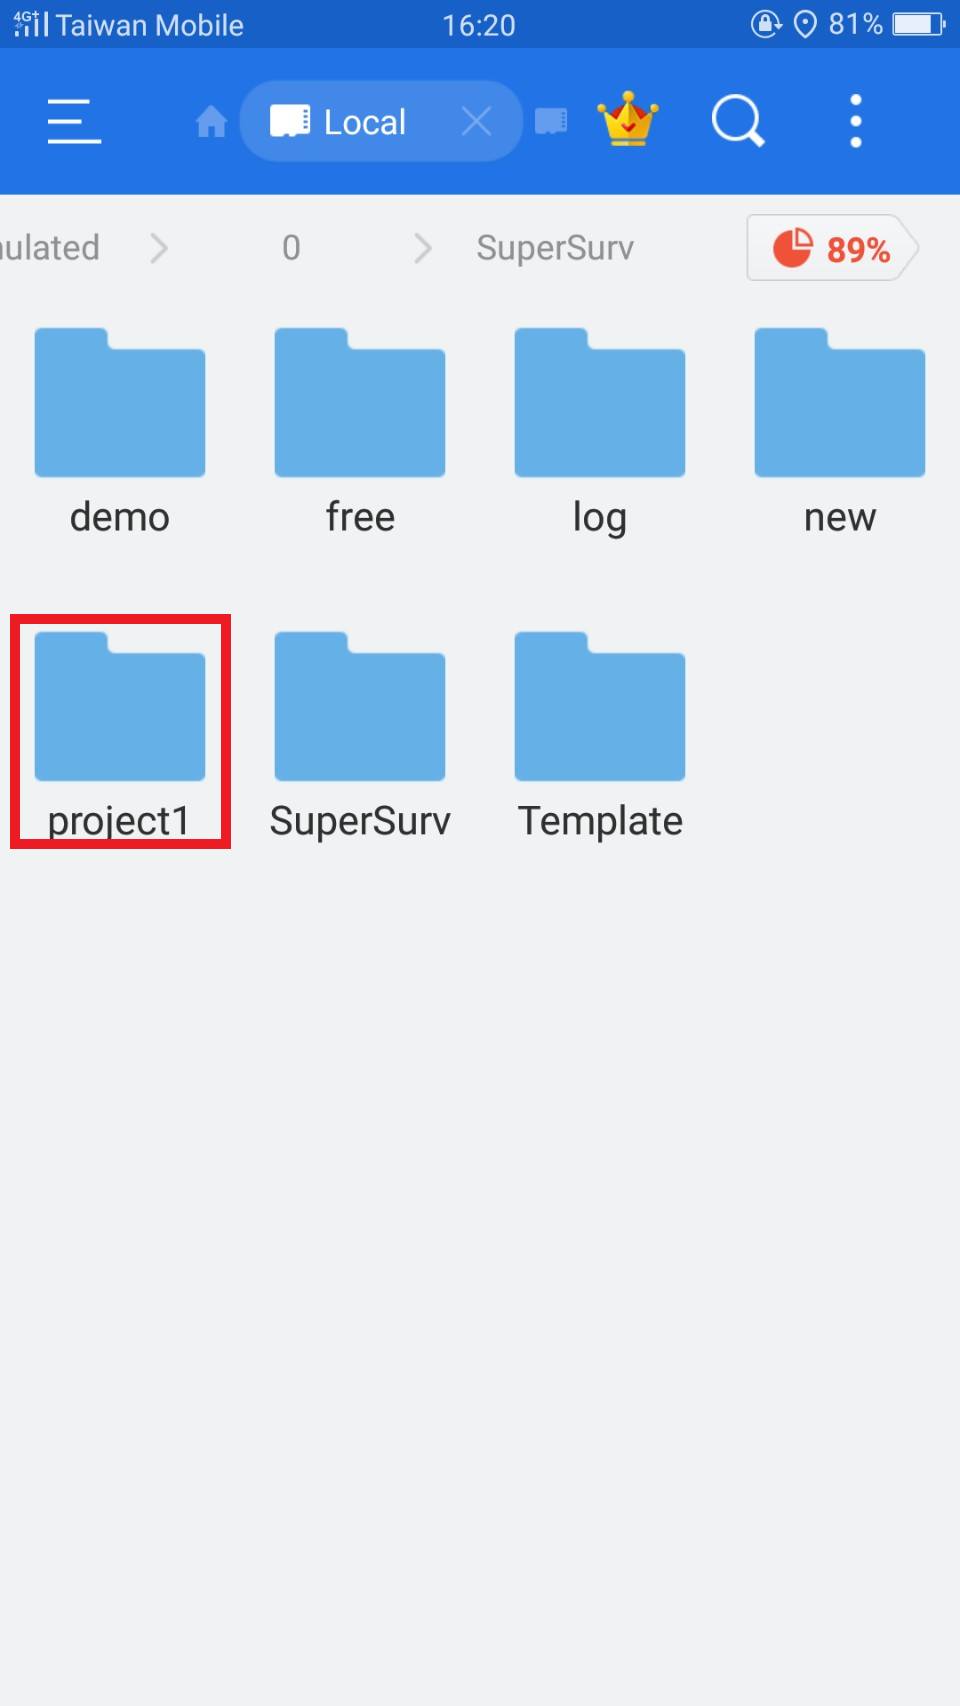
The project folder includes the subfolders:
Layer: All the layers created in the project are saved in the folder. To add the existing layers to use in SuperSurv, you can copy the layers (SHP/GEO) to Layer folder. Then, start SuperSurv, tap Manager Layer > Add Layer, you can therefore add the layer to map by checking it.
Photo: Photos taken with SuperSurv are saved in the folder
Track: All the track files recorded with SuperSurv are saved in the folder
Waypoint: Waypoint files exported from SuperSurv are saved in the folder
SPP file: SPP project file
Therefore, every time you create a new project, SuperSurv folder will create the folder and subfolders.
© 2017 Supergeo Technologies Inc. All Rights Reserved.