
Creating a New Layer
1.If you have no available layers, please create a new layer. Tap ![]() and choose a layer you want.
and choose a layer you want.

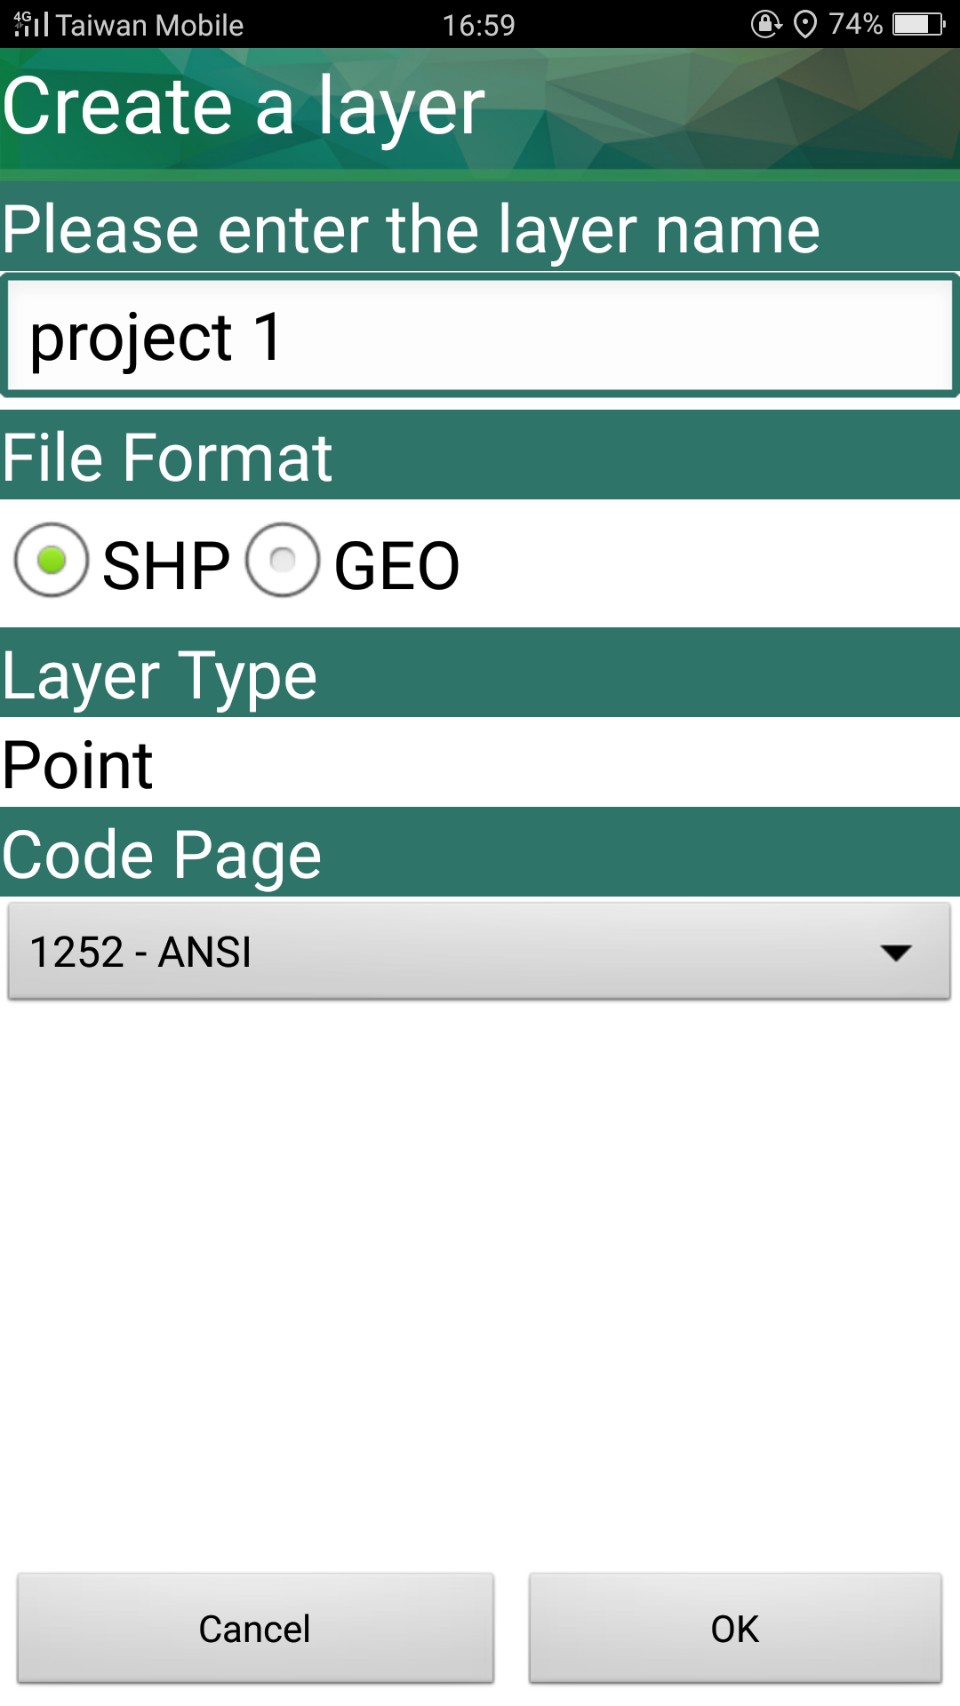
2.In the setting page, please enter the layer file name, layer name, select code page, layer type (point, line, polygon) and choose the file format (SHP or GEO). After setting is finished, tap OK.
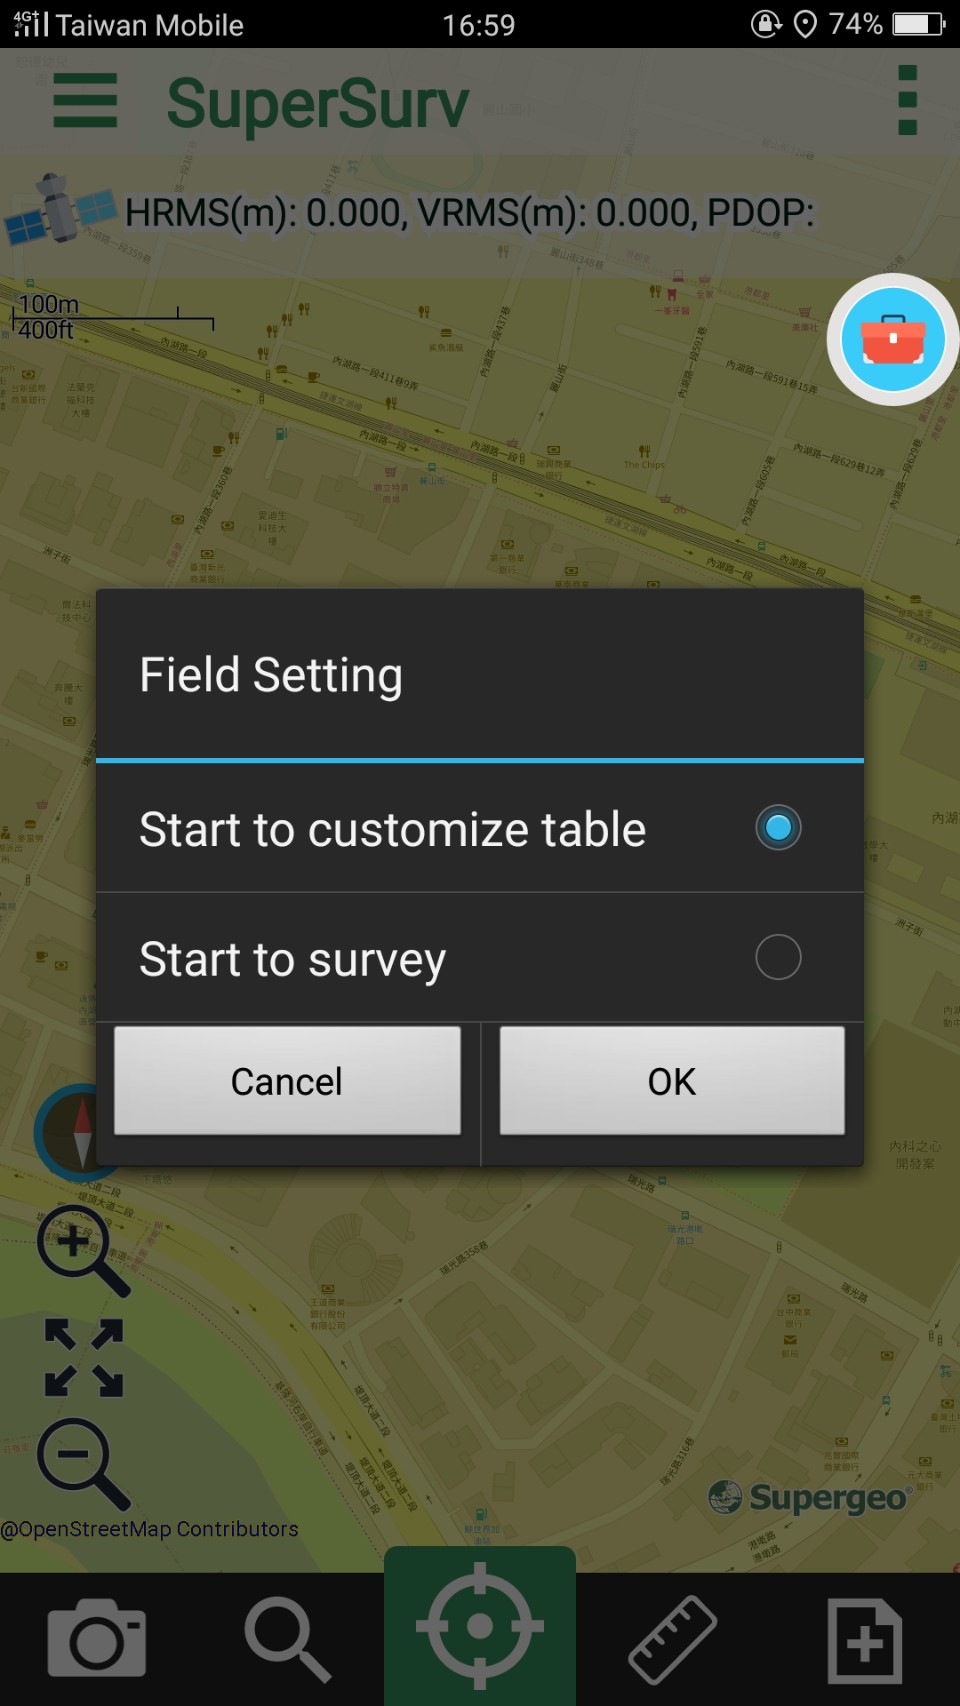
3.Field setting dialog appears, choose Start to Customize Table, and tap OK.
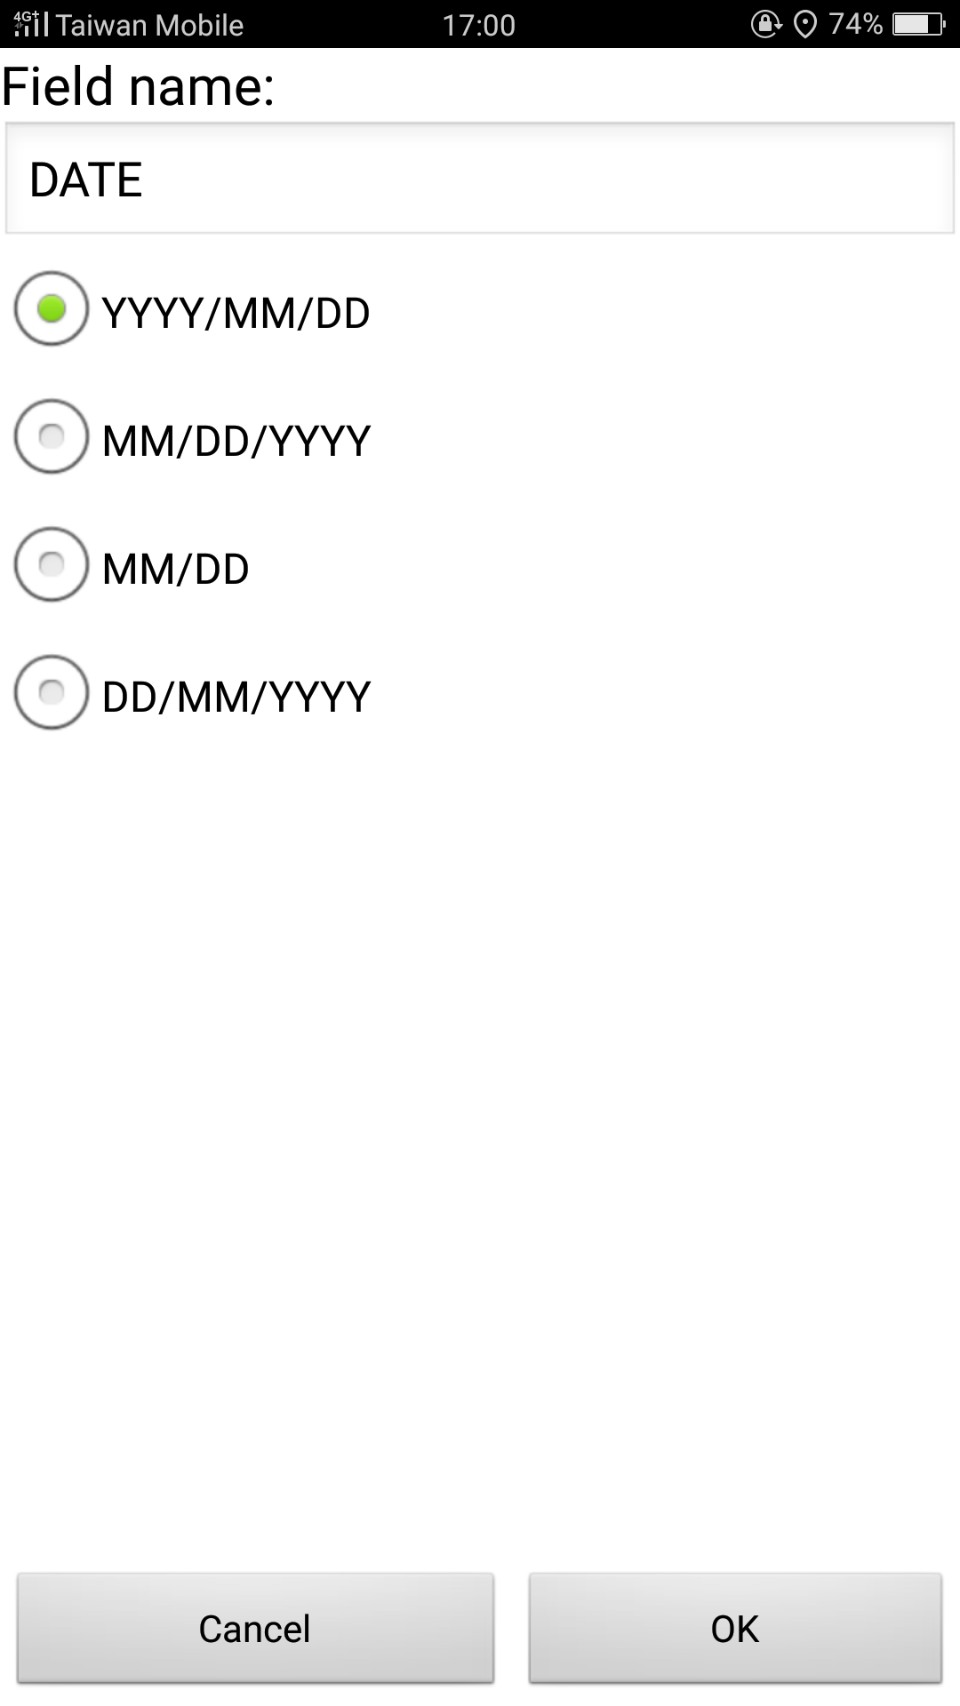
4.In “Create a New Layer”, set the field name and field properties. You can tap a field to set the field format in Field Setting.
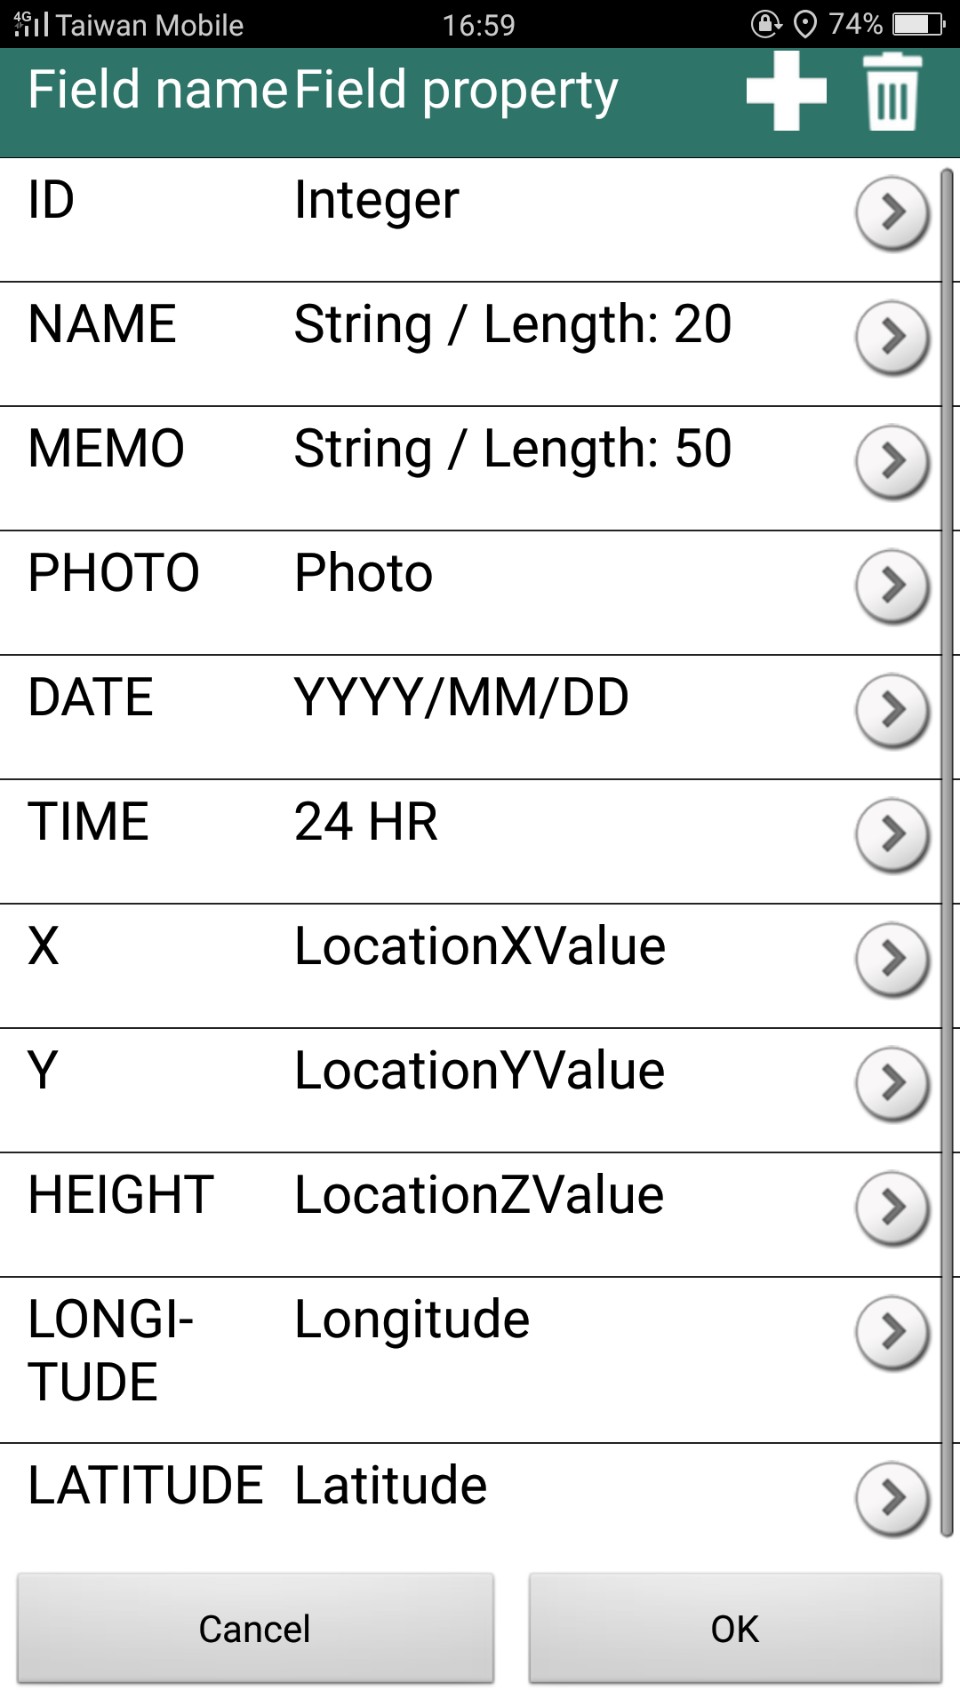
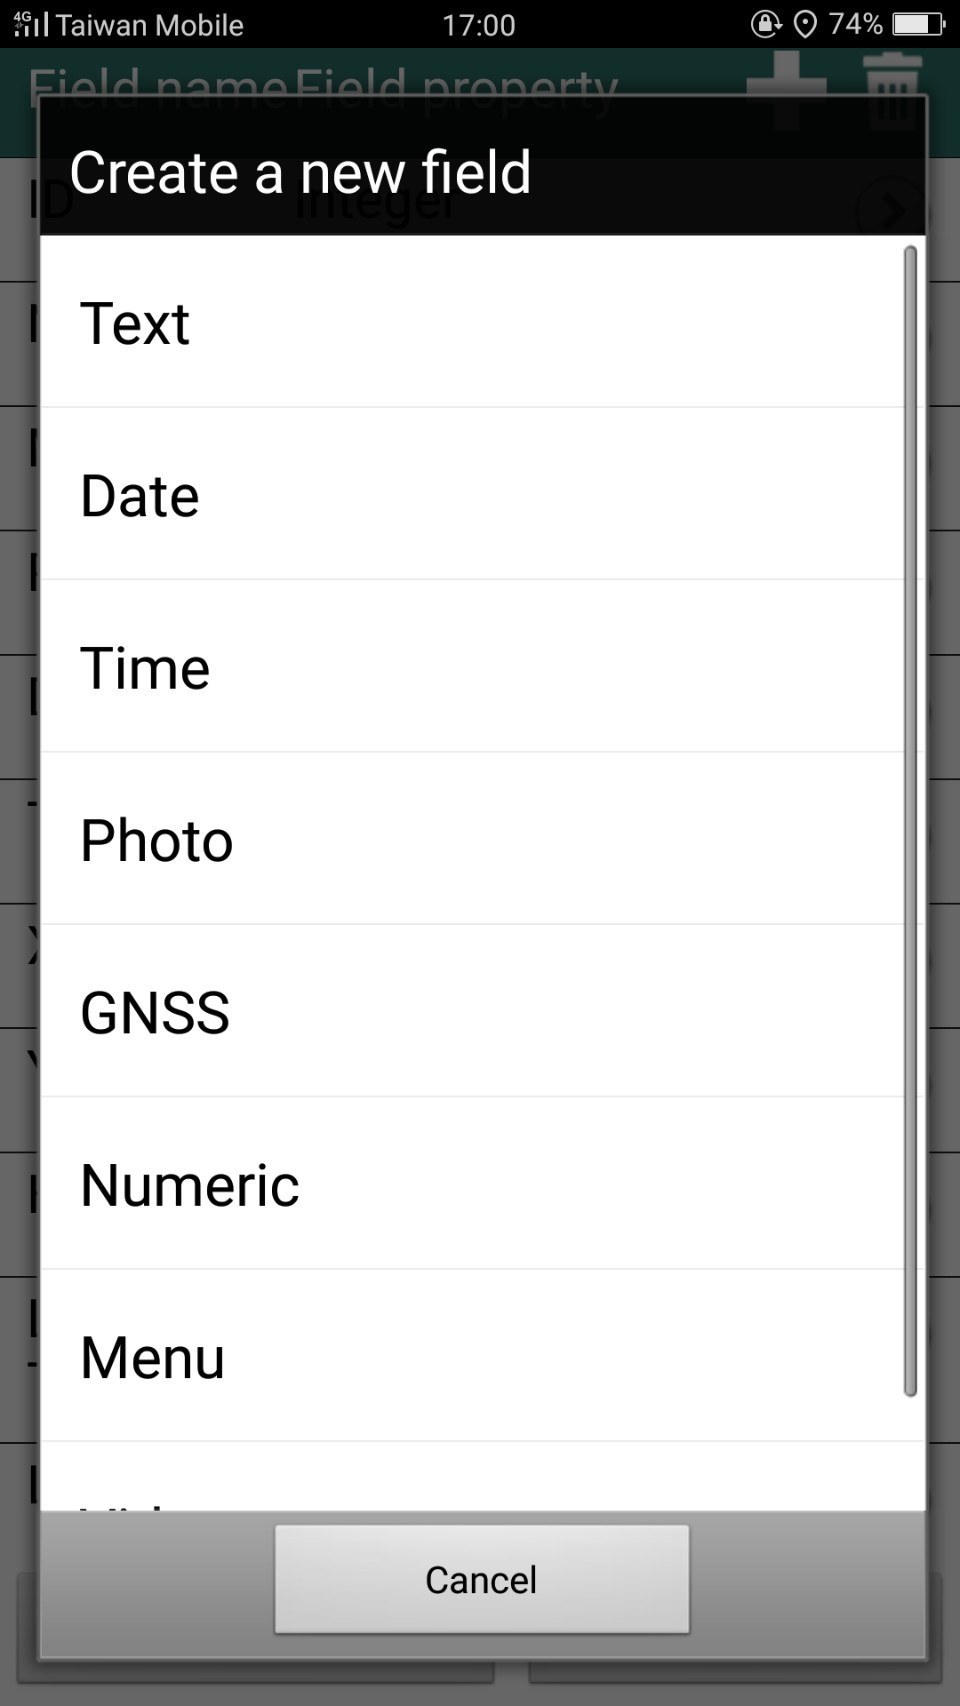
5.To create a new field, please tap ![]() , “Create a new field” appears. Please select a field type and set the format. About the details of the field type and format, please refer to Custom Table.
, “Create a new field” appears. Please select a field type and set the format. About the details of the field type and format, please refer to Custom Table.
6.After the setting is finished, please tap OK and back to the map. Survey toolbar shows up on the top of the map.
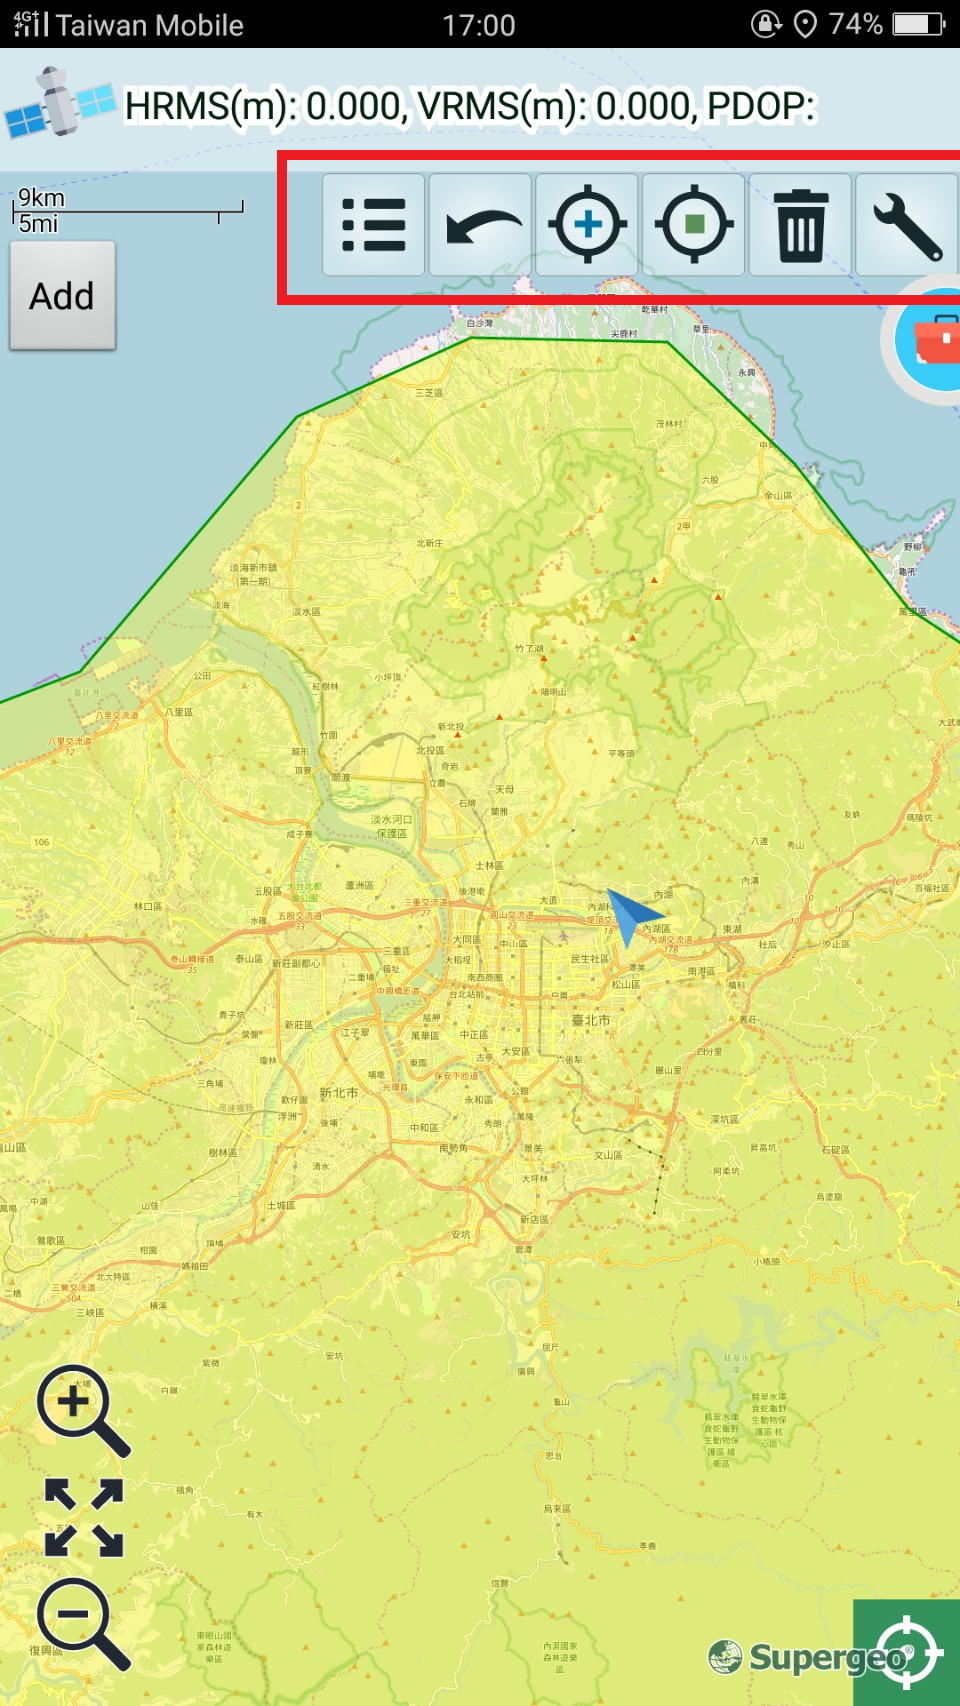
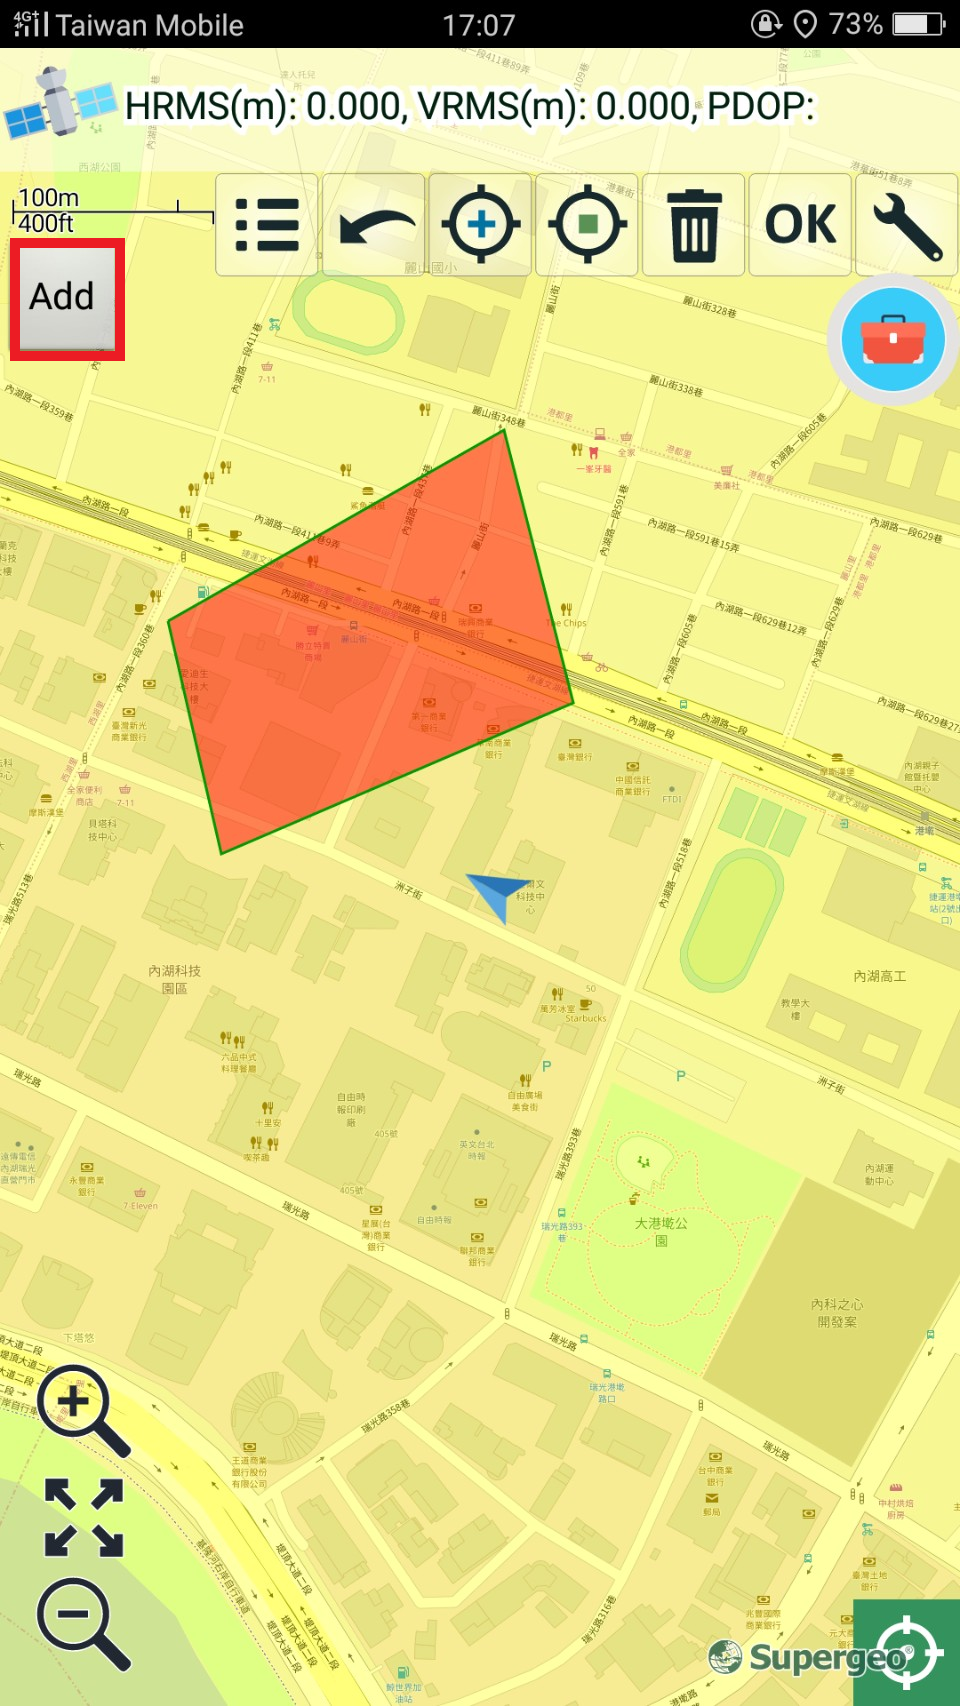
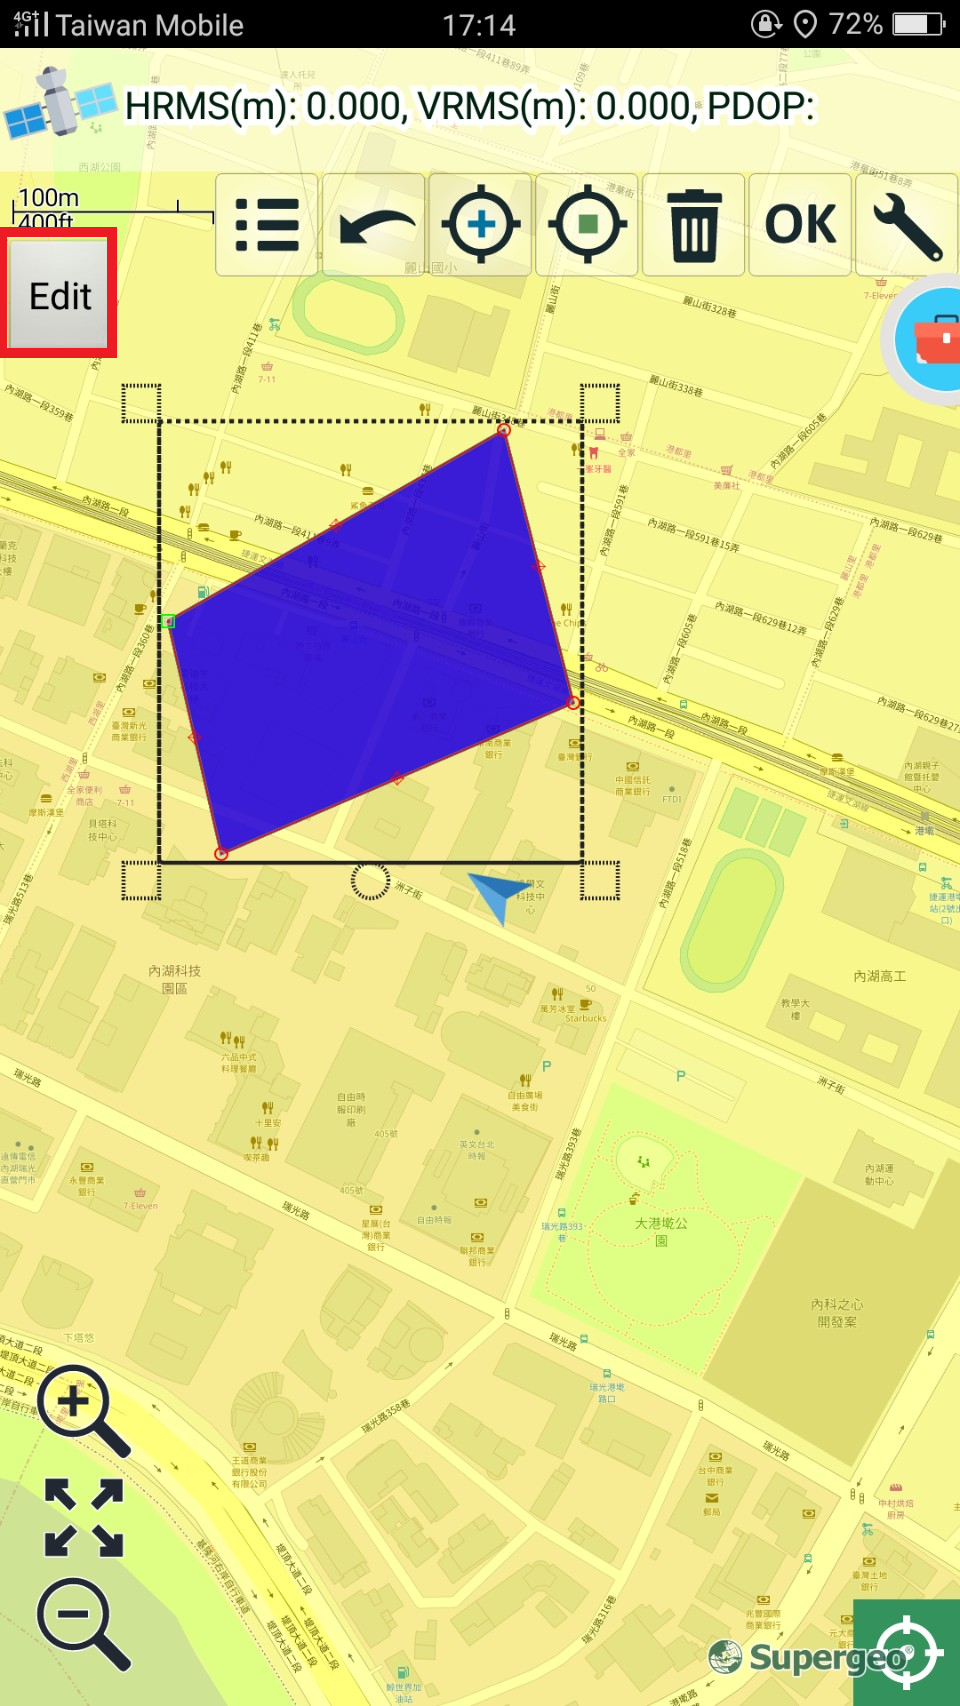
7.Then, there are two modes. One is add ![]() . The other one is edit
. The other one is edit ![]() . When it is add mode, you can choose type of layer, and create features.
. When it is add mode, you can choose type of layer, and create features.
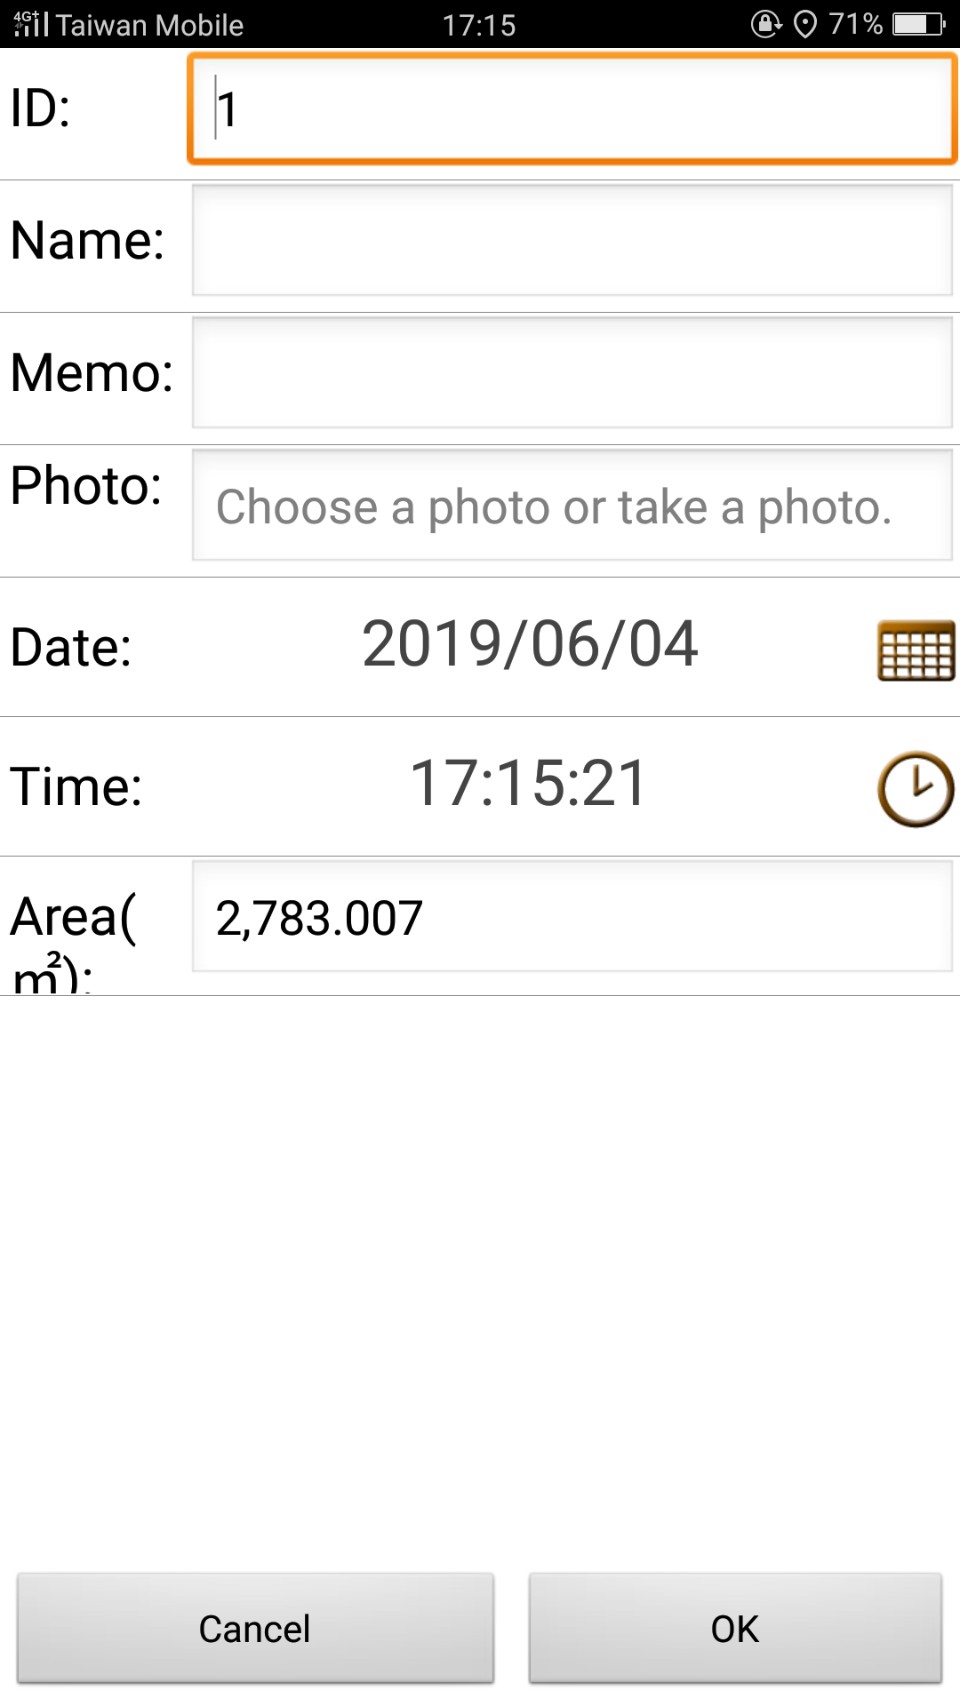
8.After a feature is created, if you would like to enter attribute data, you can long-press the feature you created in edit mode. Then the attributes page will show up.
You can edit the attribute data in Enter Attributes page.
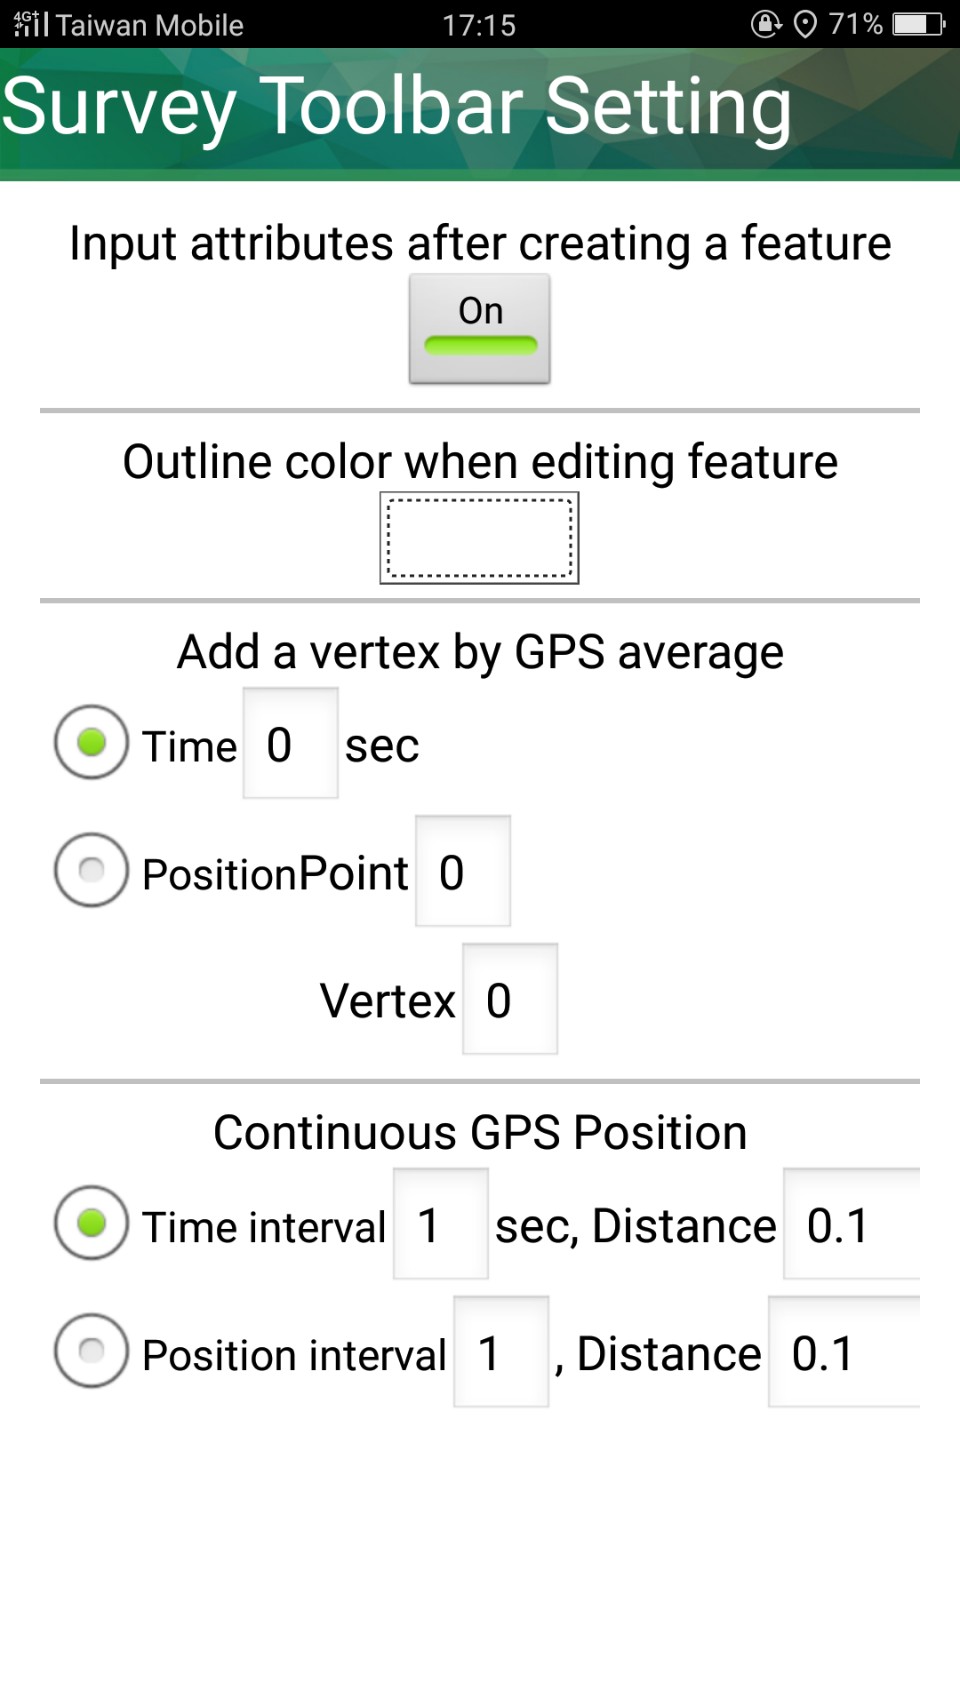
9. Also, you can edit the attributes right after a feature is created. Please tap Survey Setting![]() , and set “Input attributes after creating a feature” as On and tap OK. Back to the map, you can see Enter Attributes page right after a feature is created.
, and set “Input attributes after creating a feature” as On and tap OK. Back to the map, you can see Enter Attributes page right after a feature is created.
© 2017 Supergeo Technologies Inc. All Rights Reserved.