
NetworkTool
It provides route planning function; through the settings of flags and barriers, the system will work out the superior route planning.
Firstly add a road layer to SuperPad. Then tap the NetworkTool button in the main toolbar to switch to NetworkTool toolbar. The system will auto-detect whether a corresponding .nrt file of the same filename exists in the folder when the road layer is added; if yes, the system will automatically add the .nrt file to SuperPad. But if the .nrt file is saved in another folder, please tap ![]() and add the .nrt file by yourself.
and add the .nrt file by yourself.
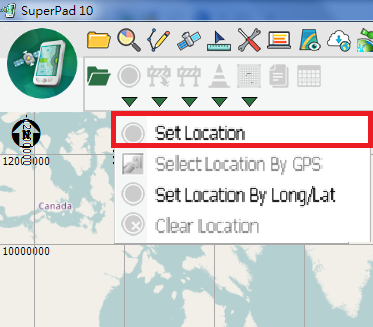
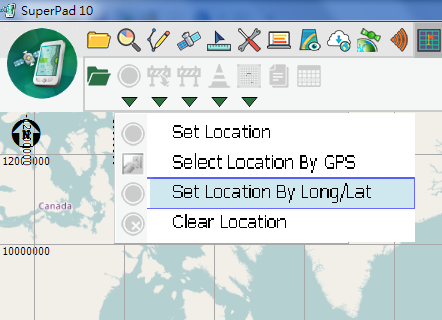
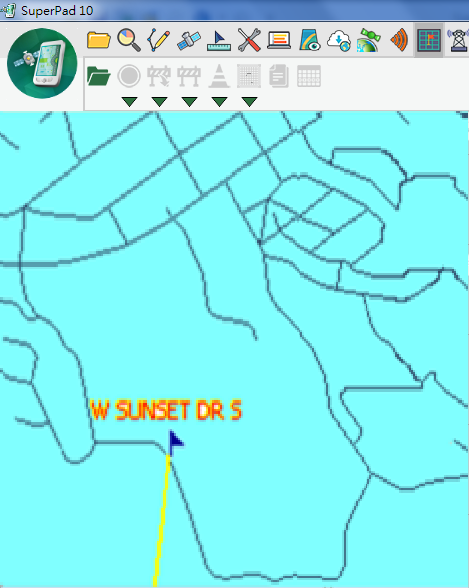
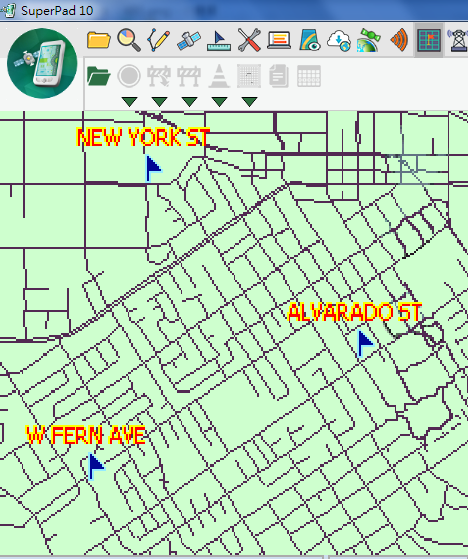
Select Set Location and tap the location on the map where you want to mark a label, and the ![]() shows up right at the position. Location is a simple label which facilitates users to find out some specific position. Only one Location exists on a map; if necessary, user can convert Location to Stop or Barrier, which will be described in the following section.
shows up right at the position. Location is a simple label which facilitates users to find out some specific position. Only one Location exists on a map; if necessary, user can convert Location to Stop or Barrier, which will be described in the following section.
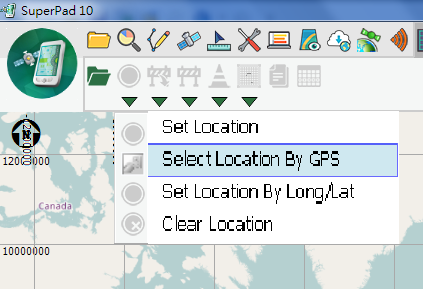
To set a Location at the current GPS position, please activate GPS first and switch to the Network Tool toolbar. Tap the Set Location dropdown arrow and select the Select Location By GPS, a Location label shows up at the current GPS position.
If you want to set up the Location with longitude and latitude, please select Set Location By Long/Lat.
The “Set Location by Longitude” dialog box shows up; in Longitude Latitude the values of the current GPS position are displayed. You can enter the values by yourself. After the values are entered, please tap OK.
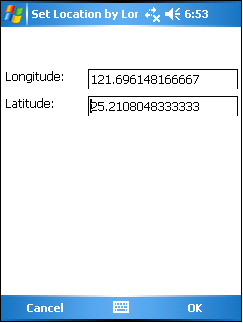
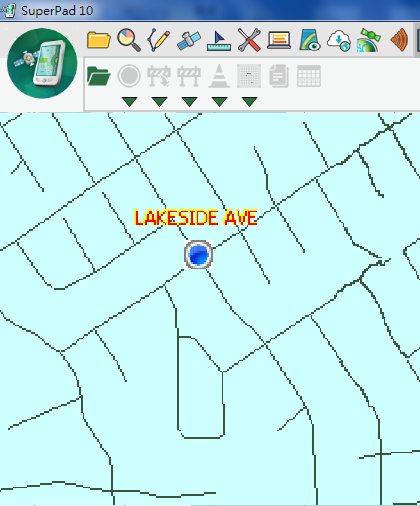
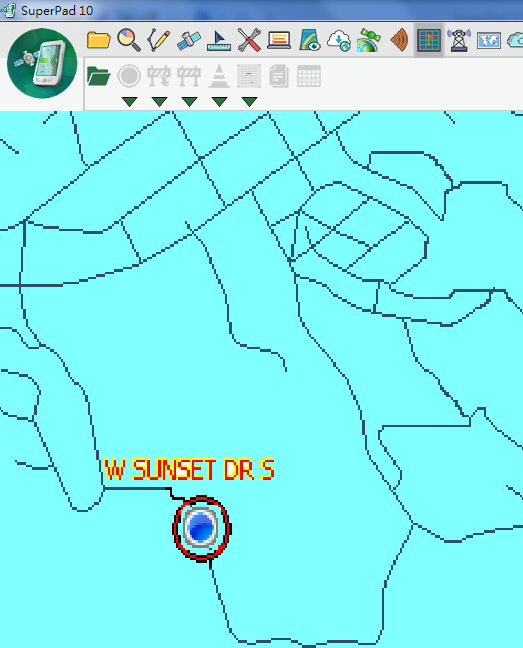
Go back to the map, a Location will be added to the position where you just set up.
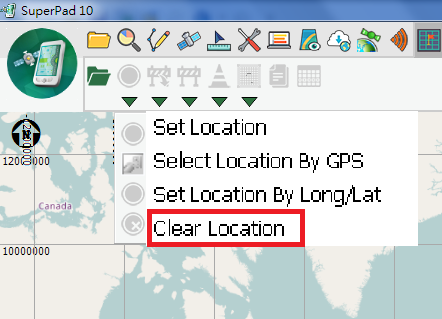
If you want to clear Location, please tap Clear Location.
If you want to convert the Location to Stop, please tap Convert To Stop. The Location turns to Stop.
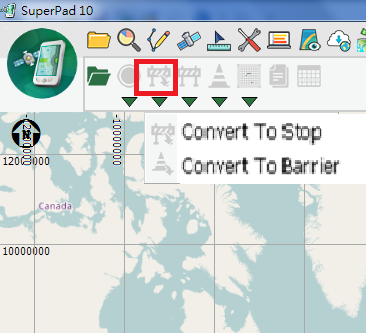
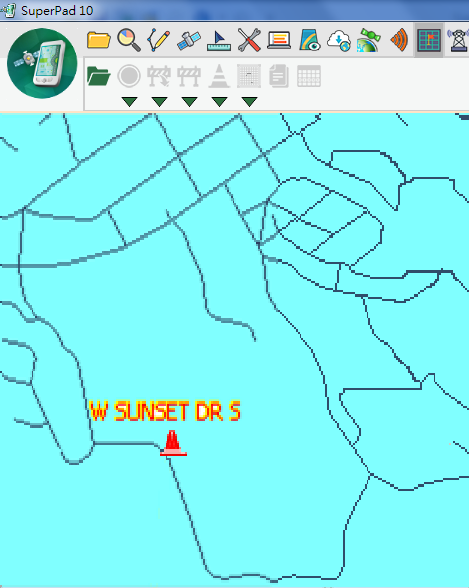
If you want to convert Location to Barrier, please tap Convert To Barrier. And Location turns to Barrier.
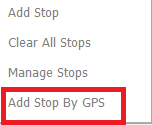
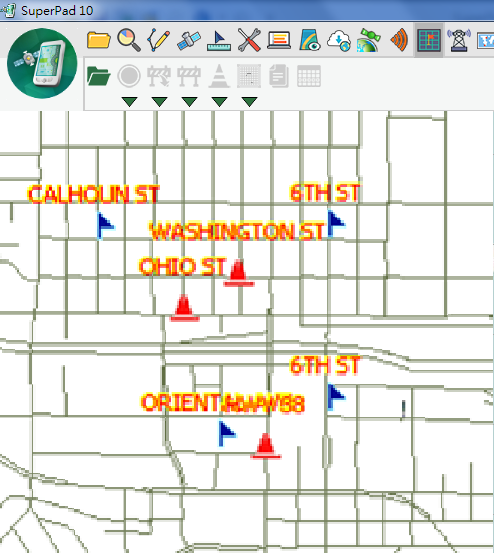
Tap the Add Stop dropdown arrow and a tool menu shows up. To add stop, please tap Add Stop.
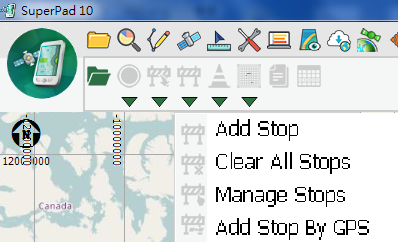
In the next, tap the position where you want to add a stop, and then a stop will be added to the map. Repeat the way to add stops till all the stops are added.
To clear all stops, please tap Clear All Stop on the tool menu, and then all the stops on the map will be cleared up.
To manage the stops, please tap the Manage Stops on the tool menu. After entering Flags Manager dialog box, you can adjust the stop order or remove it.
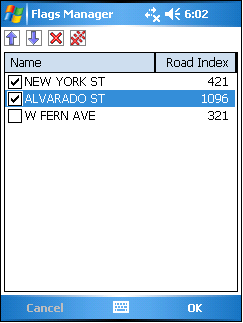
First of all, select the stop you want to adjust, and you will find the tools on the upper left part become enabled.
![]() : the stop order is moved up by one place.
: the stop order is moved up by one place.
![]() : the stop order is moved down by one place.
: the stop order is moved down by one place.
![]() : remove the selected stop.
: remove the selected stop.
![]() : remove all stops.
: remove all stops.
The unchecked locations are not viewed as stops, so the system will not plan to pass the locations.
To add stops at GPS position, please activate GPS first. Then tap Add Stop By GPS on the tool menu.
A flag named GPS will be added at the GPS position on the map.
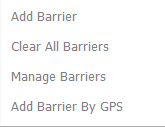
To add barriers, tap the Add Barrier dropdown arrow. When tool menu shows up, tap Add Barrier.
In the next, tap the location on the map where you want to add a barrier, and the barrier will be added to the map. Repeat the way to add barriers till all barriers are added to the map.
To clear all barriers, please tap Clear All Barriers.
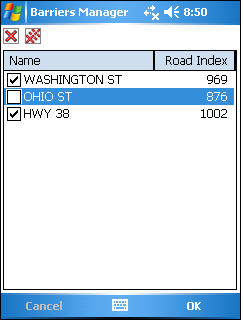
To manage barriers, please tap Manage Barriers. Select a barrier you want to remove, and click ![]() to remove it. Or you can click
to remove it. Or you can click ![]() to remove all the barriers. In route planning the unchecked barriers are not viewed as barriers to the system, so the system might plan to pass the barrier's position.
to remove all the barriers. In route planning the unchecked barriers are not viewed as barriers to the system, so the system might plan to pass the barrier's position.
To add barrier at the GPS position, activate GPS first and tap the Add Barrier By GPS, and a barrier will be added to the map at current GPS position.
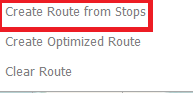
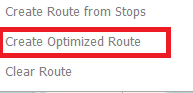
When stops and barriers are set up, tap Create Route from Stops, and the result will be displayed on the map.
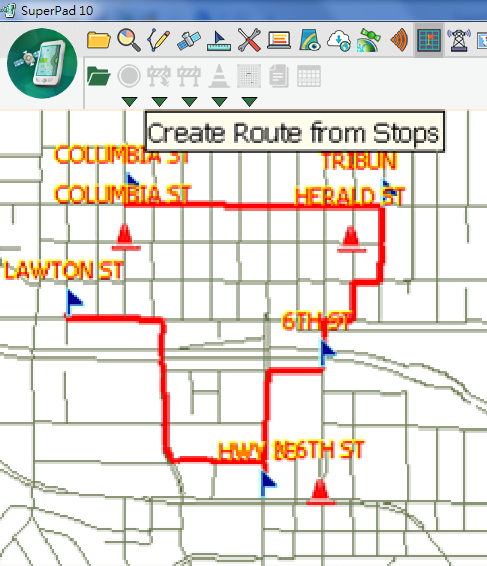
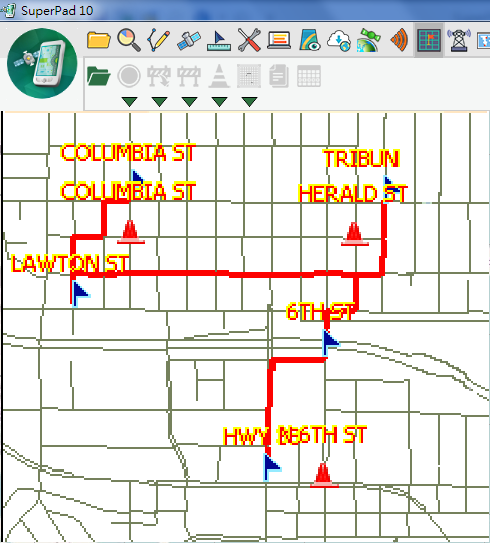
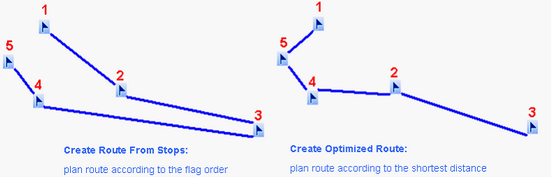
If you want to plan the shortest route, please select Create Optimized Route . To create the Optimized Route, the system will plan the route according to the nearest stop instead of the stop order; this method is suitable for the travel route planning. Please see the Create Route from Stops result in the previous part. The route is planned according to the specified stop order, while the figure on the right side, the Create Optimized Route result, is planned according to the nearest stop instead of the order. Therefore, it will go to the nearest stop first. Please see the figures below to tell the difference between Create Route from Stops and Create Optimized Route.
To clear the route planning, please tap Clear Route.
Tap Driving Direction and “Road List” dialog box shows up. The dropdown list in the upper part allows users to select the road section, and the detailed instructions of direction and distance are listed in the lower part. When you select a section, tap ![]() and tap OK.
and tap OK.

The map will pan to the extent of the selected road section. Please see the third figure below.
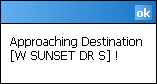
When you are approaching the destination, a message like the figure below will pop up.
© 2017 Supergeo Technologies Inc. All Rights Reserved.