
Settings
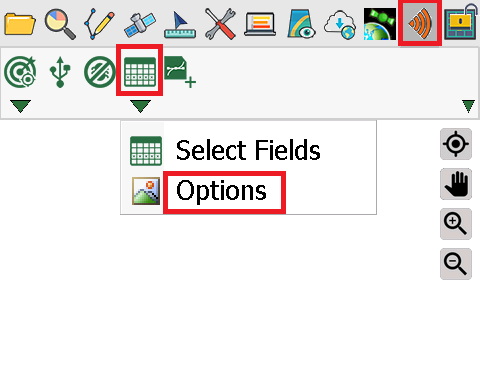
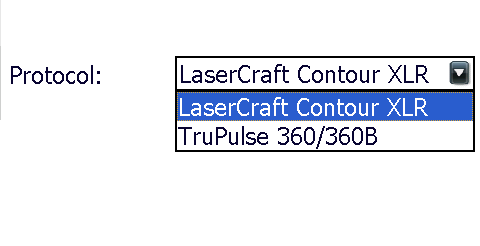
1.Before starting measurement with Laser add-on, please complete the settings to connect mobile device and laser rangefinder. Firstly, tap the Select Fields drop-down menu and tap Options. The “Options” dialog box shows up, tap the Protocol drop-down menu and select the laser rangefinder to connect. Tap OK.
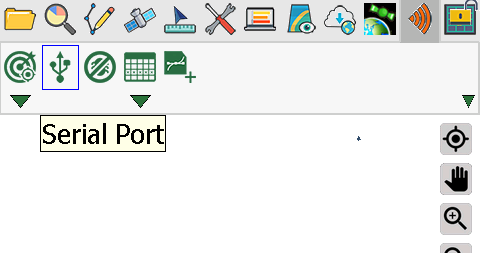
2.Set the connection settings. Please tap “Serial Port Options”, the “Serial Port Options” dialog box shows up and set the items.
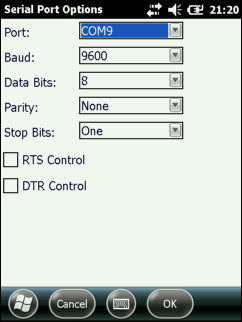
The serial port options are explained in the table below:
Name |
Content |
Port |
Define the serial port of the mobile device to connect to laser rangefinder. |
Baud |
Define the transmission rate of laser rangefinder. |
Data Bits |
The count of bit which laser rangefinder transmits data. |
Parity |
The count of parity which laser rangefinder transmits data. |
Stop Bits |
The last bit transmitted by laser rangefinder. |
3.Add the base map to SuperPad and set the spatial reference of each layer. Specify the map spatial reference WGS 84.
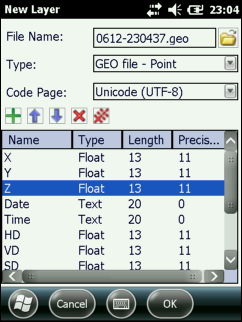
4.Create a new layer to store all the position data by tapping New Layer. Because the laser rangefinder measures the position by shooting one spot, the obtained measurement result belongs to one spot as well. So please create a layer of point type. Eleven attribute fields are built in the layer by the system to save the measurement results. Or you can adjust the fields according to your needs. Users can add a new field by tapping![]() . If one field is selected, users can adjust the order by tapping
. If one field is selected, users can adjust the order by tapping![]() , delete field by tapping
, delete field by tapping ![]() or remove all fields by tapping
or remove all fields by tapping![]() . After all the fields are created, tap OK.
. After all the fields are created, tap OK.
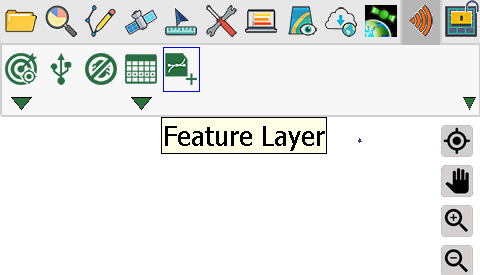
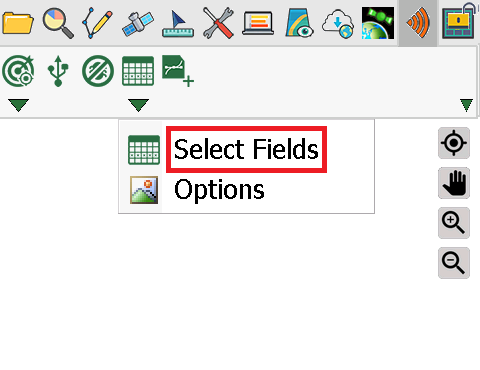
5.When a point layer is created, please tap Select Fields to set the measurement information to be saved in which field.
6.The “Field” dialog box shows up, there are two tabs, Standard and Advanced.
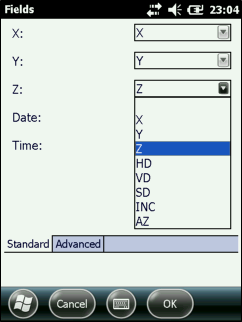
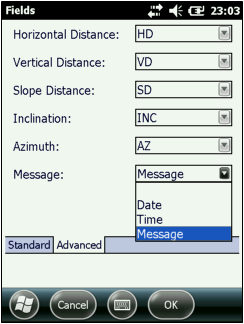
Users can decide the information in Standard tab to be saved in which attribute field through the drop-down menu. For instance, tap the drop-down menu of Z, you can select the field Z from the field list to record the altitude information.
Info Name |
Info Contents |
Field |
X |
Longitude |
X |
Y |
Latitude |
Y |
Z |
Altitude |
Z |
Date |
Date |
Date |
Time |
Time |
Time |
Identically, the Advanced tab include the information:
Info Name |
Info Contents |
Field |
Horizontal Distance |
The horizontal distance from the measurement spot to the target. |
HD |
Vertical Distance |
The vertical distance from the measurement spot to the target. |
VD |
Slope Distance |
The slope distance from the measurement spot to the target. |
SD |
Inclination |
The inclination from the measurement spot to the target. |
INC |
Azimuth |
The azimuth from the measurement spot to the target. |
AZ |
Message |
The original message of the laser rangefinder. |
Message |
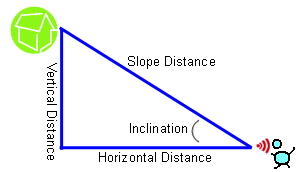
Please refer to the figure below for the meanings of information in the Advanced tab. As to how the laser rangefinder calculates and measures distance, please find in your laser rangefinder manual.
© 2017 Supergeo Technologies Inc. All Rights Reserved.