
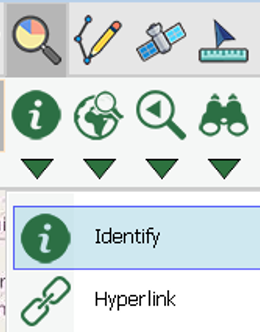
Identify
Identify function allows you to query the feature's attributes. On the map, draw a rectangle with your stylus, and the features covered by this rectangle (including features of different layers) will be shown on the result dialog box. In the dialog box you can find the result features and expand the attribute data. Even more, you can follow the highlight in yellow flash to search the correct position of the feature.
1.Tap the Explorer button on the main toolbar, switch to Explorer toolbar, tap Identify.
2.When the button reveals functioned status, drag a rectangle with stylus or mouse on the map where you want to query attributes.
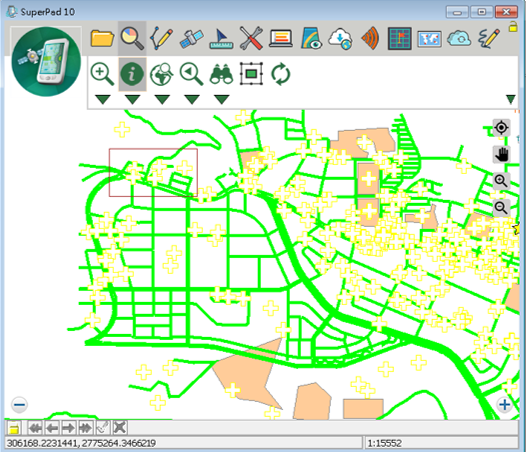
3.The dialog box appears and all the covered features will be listed by layer. The top level is the layer name, and through the icon to the left of layer name you can learn the layer type is point, line or polygon. ![]() refers that the layer can be expanded to display all features it covers;
refers that the layer can be expanded to display all features it covers; ![]() means the layer has completely expanded all its features.
means the layer has completely expanded all its features.
Besides, there are seven buttons in a row on the right side of the dialog box. A feature should be selected first, and then the seven buttons can be functioned.
![]() : The selected feature is highlighted. After a feature is selected, tap this button and the corresponding feature will be highlighted. Then, you will learn the correct position of the feature.
: The selected feature is highlighted. After a feature is selected, tap this button and the corresponding feature will be highlighted. Then, you will learn the correct position of the feature.
![]() : Move to feature. After a feature is selected, tap this button and the feature will be zoomed out to the map center and highlighted so that you can learn the feature's position.
: Move to feature. After a feature is selected, tap this button and the feature will be zoomed out to the map center and highlighted so that you can learn the feature's position.
![]() : Pan to Center. Select a feature and tap this button; the selected feature will be panned to the map center and highlighted, so you can know the position of feature.
: Pan to Center. Select a feature and tap this button; the selected feature will be panned to the map center and highlighted, so you can know the position of feature.
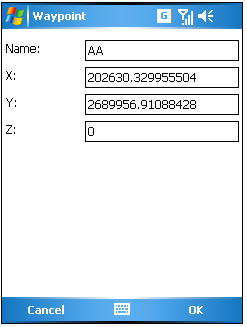
![]() : Add waypoint. After a feature is selected, tap this button and “Waypoint” dialog box appears. This feature can be set as waypoint and the XY coordinate values will be input automatically in the dialog box or you can input manually.
: Add waypoint. After a feature is selected, tap this button and “Waypoint” dialog box appears. This feature can be set as waypoint and the XY coordinate values will be input automatically in the dialog box or you can input manually.
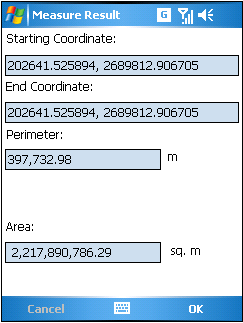
![]() : Measure tool. After a feature is selected, tap this button and the “Measure Result” dialog box appears. The measure result is the same as the result of using Feature Measurement tool, the info includes:
: Measure tool. After a feature is selected, tap this button and the “Measure Result” dialog box appears. The measure result is the same as the result of using Feature Measurement tool, the info includes:
Starting coordinate: the start point's coordinate values of the feature.
End coordinate: the end point's coordinate values of the feature.
Perimeter: the total distance from the start to end point.
Area: measures the polygon's area.
(point, line and polygon have different measure results, please refer to Feature Measurement.)
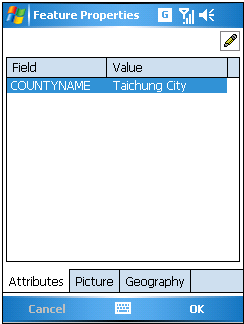
![]() : Feature Properties. Attributes tab shows the properties of the feature.
: Feature Properties. Attributes tab shows the properties of the feature.
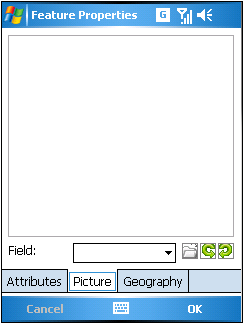
The hyperlink picture is presented in Picture tab if the feature has one, and the picture can be rotated by tapping ![]() . You can specify the hyperlink field and click
. You can specify the hyperlink field and click ![]() to change the picture.
to change the picture.
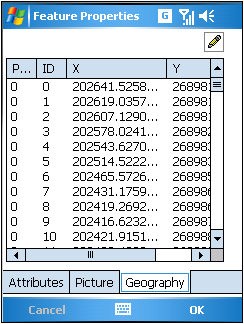
Geography tab displays the coordinates.
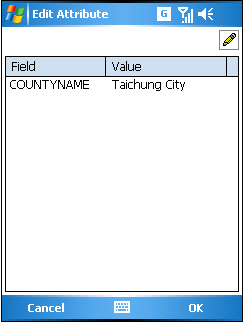
![]() : edit attribute. Select one feature and tap
: edit attribute. Select one feature and tap ![]() . The “Edit Attribute” dialog box shows up. Select an attribute and tap
. The “Edit Attribute” dialog box shows up. Select an attribute and tap ![]() to edit the contents.
to edit the contents.
NOTE: the pop-up dialog box in SuperPad can be zoomed in or out by dragging the lower right corner with stylus. It is movable by dragging the top of the dialog box, which can avoid the map being covered. Besides, at the upper right corner, tapping the ![]() can minimize the dialog box, tapping
can minimize the dialog box, tapping ![]() can close the dialog box, tapping
can close the dialog box, tapping ![]() can maximize the dialog to full screen, tapping
can maximize the dialog to full screen, tapping ![]() in the full screen dialog box can zoom out the dialog box, and tapping
in the full screen dialog box can zoom out the dialog box, and tapping ![]() in the minimized dialog box can zoom in the dialog box. If there is a Name field or other fields like Name, for instance “EnglishName” in the attribute table, the system will use the value of the field to be the name of the feature. If there is no Name field or so, the system will use the value of the first field to be the name of the feature.
in the minimized dialog box can zoom in the dialog box. If there is a Name field or other fields like Name, for instance “EnglishName” in the attribute table, the system will use the value of the field to be the name of the feature. If there is no Name field or so, the system will use the value of the first field to be the name of the feature.
© 2017 Supergeo Technologies Inc. All Rights Reserved.