
Feature Layer
The new created layer will be added to the current map automatically and under the editable status in SuperPad. There are three types of layer provided for users to create or edit in SuperPad, including Point, Line and Polygon.
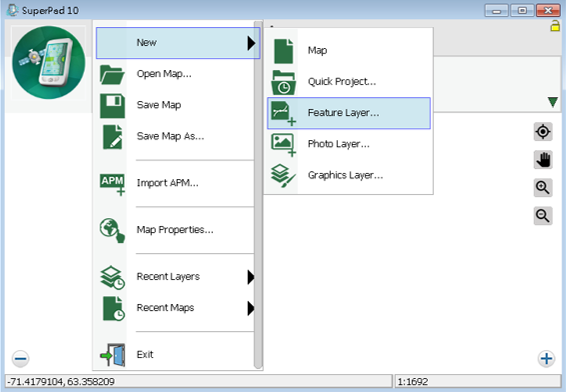
1.Tap the Map/Layer button on the main toolbar, switch to Map/Layer toolbar, tap the downward arrow of Open Map > New > Feature Layer.
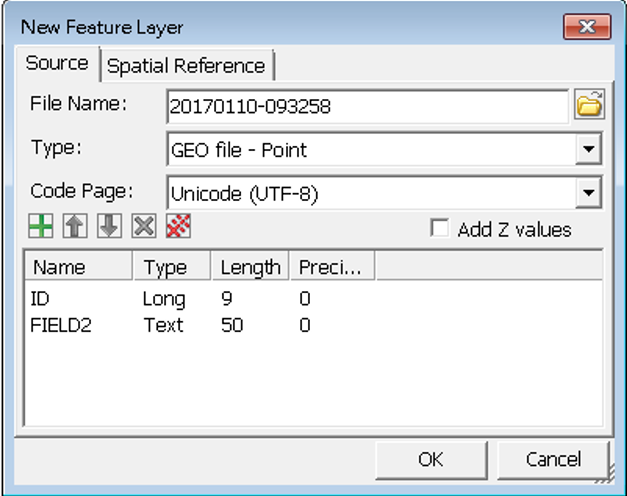
2.The “New Layer” dialog box shows up, please input the field data as below:
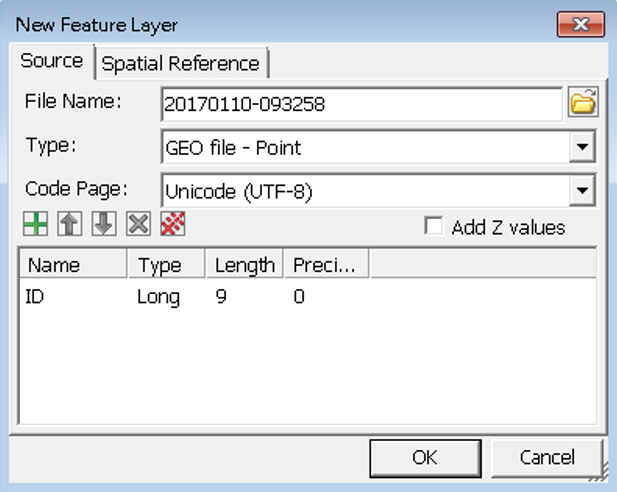
File Name: give a name for the file. Tap ![]() and choose a folder to store the creating layer.
and choose a folder to store the creating layer.
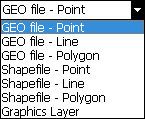
Type: tap the dropdown arrow and the layer type list shows up. It offers two different file types, *.geo and *.shp for each Point, Line and Polygon format.
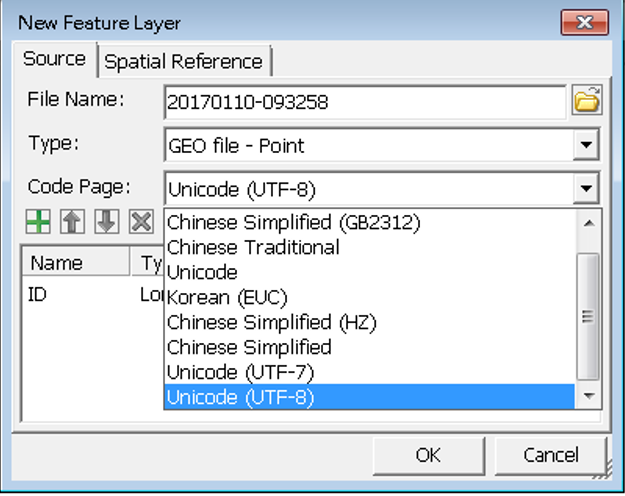
Code Page: to select the code page for the layer that is suitable for the area and culture. Code Page is also termed as “character encoding” which consists of a table of values. The combination of values can make into characters, and the combination of characters make into texts. Through this way, the values can be used to represent a specified language. People in different areas use different languages; even the same language might be used in a different way with different habits or idioms in different areas. Through the code page you can specify the area and culture and then select the corresponding texts to display. Please select the code page suitable for the language and area so that the situation of unreadable character can be avoided.
Add Z Value: New feature in SuperPad 10, by checking up this option, user are allow to edit the Z value in geometry of each vertex within the features, or collect the real time observation height via GNSS. To edit the Z value, you will find it easy to operate by using the Feature Properties function in Feature Properties Tool.
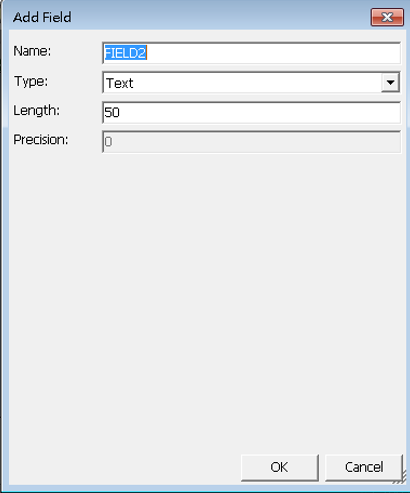
3.Then add the field. You will see a row of tools![]() . Tapping the
. Tapping the ![]() button can add attribute field, and you will enter “Add Field” dialog box. Then please input the information below:
button can add attribute field, and you will enter “Add Field” dialog box. Then please input the information below:
Name: give a name for the field.
Type: specify the attribute value of the field is text or numeric. The numeric values include four types, Short, Long, Float, and Double.
Length&Precision: if you select Text in the Type field, Length will be able to be set up. If you select the numeric type as Short, Long, Float or Double in Type field, the system will automatically give a default value in Length and Precision fields. So the two fields will be unable to be modified.
4.As you finished the information input, tap OK and return to the “New Layer” dialog box. The newly created field will be added to the list. Please follow the steps described above to add more needed fields.
You can select a field and tap ![]() to adjust the order. Also you can tap
to adjust the order. Also you can tap ![]() or
or ![]() to delete the selected field or all fields. As the fields are successfully added, tap “OK.” Then you can start to edit the layer, we will explain how to edit layer in Edit Features.
to delete the selected field or all fields. As the fields are successfully added, tap “OK.” Then you can start to edit the layer, we will explain how to edit layer in Edit Features.
NOTE: You need to create one field at least. Field names are not allowed to be repeated or the system will be unable to read data correctly.
© 2017 Supergeo Technologies Inc. All Rights Reserved.