
System Settings and Preparing Data
This section is to introduce how to prepare the files of the acceptable format and how to set up the reference data for this file before services are published.
As GIS services are being published to SuperGIS Server, all the properties of configuration will be recorded in Provider machine. And the properties of the configuration will promptly be transmitted to the Container machine, which actually handles the request as the GIS services are running. So every Container machine should be able to read the file format recorded by configuration and be able to normally access all the reference data of the file format.
If you want to have better performance, you need to equip every Container with the identical file format and data and then access data through Local host. However, it may result in data redundancy and cause trouble in maintenance and update. Because once the file format or data updates, every Container will need to be updated as well. If you want to avoid saving the identical data in every Container machine, you can process using UNC path or Network Access Server.
If you want to use UNC path or Network Access Server, you can't use the identity of "Local System"to register Container system but need to specify an account. We suggest you to use the account of SuperGIS Server administrator.
After SuperGIS Server is installed, there is no default account of "SuperGIS Server Administrator."You can build up the account and the connection configuration while running SuperGIS Server Maintainer for the first time. In the next, we will explain how to make the preparations before publishing services.
1. |
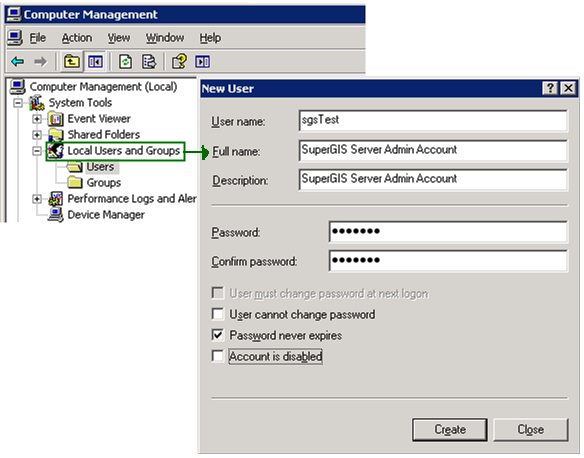
After successfully connecting with the account and password mentioned above, please enter the Provider Account tab of SuperGIS Server Maintainer window and set the administrator account information that you want to use. Then please build up a new user in "Local Users and Groups"in every Container machine, and please note that the account and password of the user in every machine should be identical to the one you have set in the Provider Account tab, so it could work smoothly. Hereafter, when we need to mention "SuperGIS Server Administrator"account, please automatically replace it with the account name and password you build up. If you have question about how to build up a new user, please ask the computer administrator in your organization for help. |
2. |
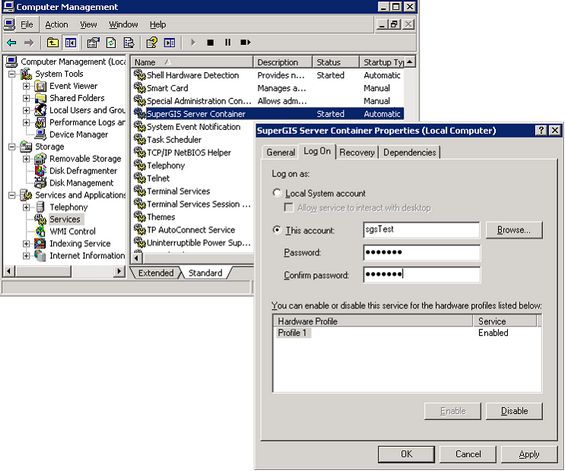
After the account and password are changed, you can find out "SuperGIS Server Container"in "Services" and please double-click to switch to "Log On"tab, choose "This account"in Log on as and enter the account and password of "SuperGIS Server Administrator"then click "OK."In the process of setting, you might need to stop and restart this service to put the settings into effect. |
3. |
Next, you need to set up the properties of "Sharing and Security"for the specific folders. These specific folders are stored in some computer of Network, and the data in the folder are the data and maps you prepare to offer to all licensed Containers to use and share. So you should use that computer and set up the related settings for the folders. Firstly, right-click the folder that you want to share and select "Sharing and Security"(the figure below takes Resources folder for example.) |
4. |
Switch to the Sharing tab, select Share this folder and click the Permissions button. |

5. |
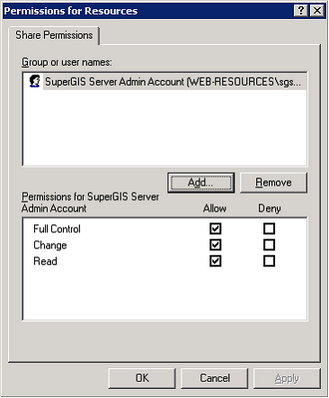
Add the user "sgsTest"you just created (please replace the SuperGIS Server Administrator with the account you created) and ensure the Full Control is checked. Meanwhile, Change and Read will also be checked. |
6. |
Click OK and close the "Share Permissions"window. |
After the settings of share folder for server are finished, the services of each container (registered with the account of SuperGIS Server Administrator) will be able to access the data in share folders with the identity of SuperGIS Server Administrator. In the next, we are going to explain how to create the GIS service contents that you want to publish with a map file generated by SuperGIS Desktop.
7. |
Start SuperGIS Desktop and click the Add Layer. |
![]()
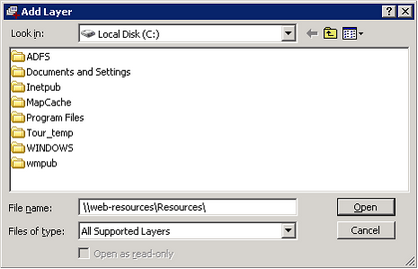
8.In the Add Layer window, enter file path in File Name. Directly enter the path that allows Container to access "\\web location\sharing\", like "\\WEB-RESOURCES\Resources\." It means the sharing folder named "Resources"is set to allow to be shared when users are connecting to the computer of "WEB-RESOURCES"Then click the Open.
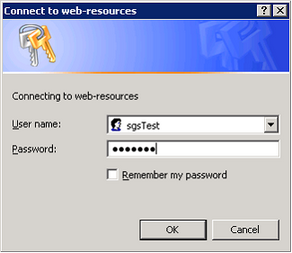
9.If you are not registering to local host with SuperGIS Server Administrator account, it will show Connect to"window on the screen. Please enter the user name and password of SuperGIS Server Administrator account on the window.
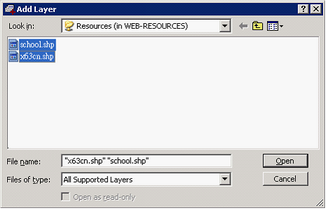
10.If it connects successfully, you can select the layer you want to add from the shared folder of remote (web-resources) in Add Layer window, and then please click the Open.
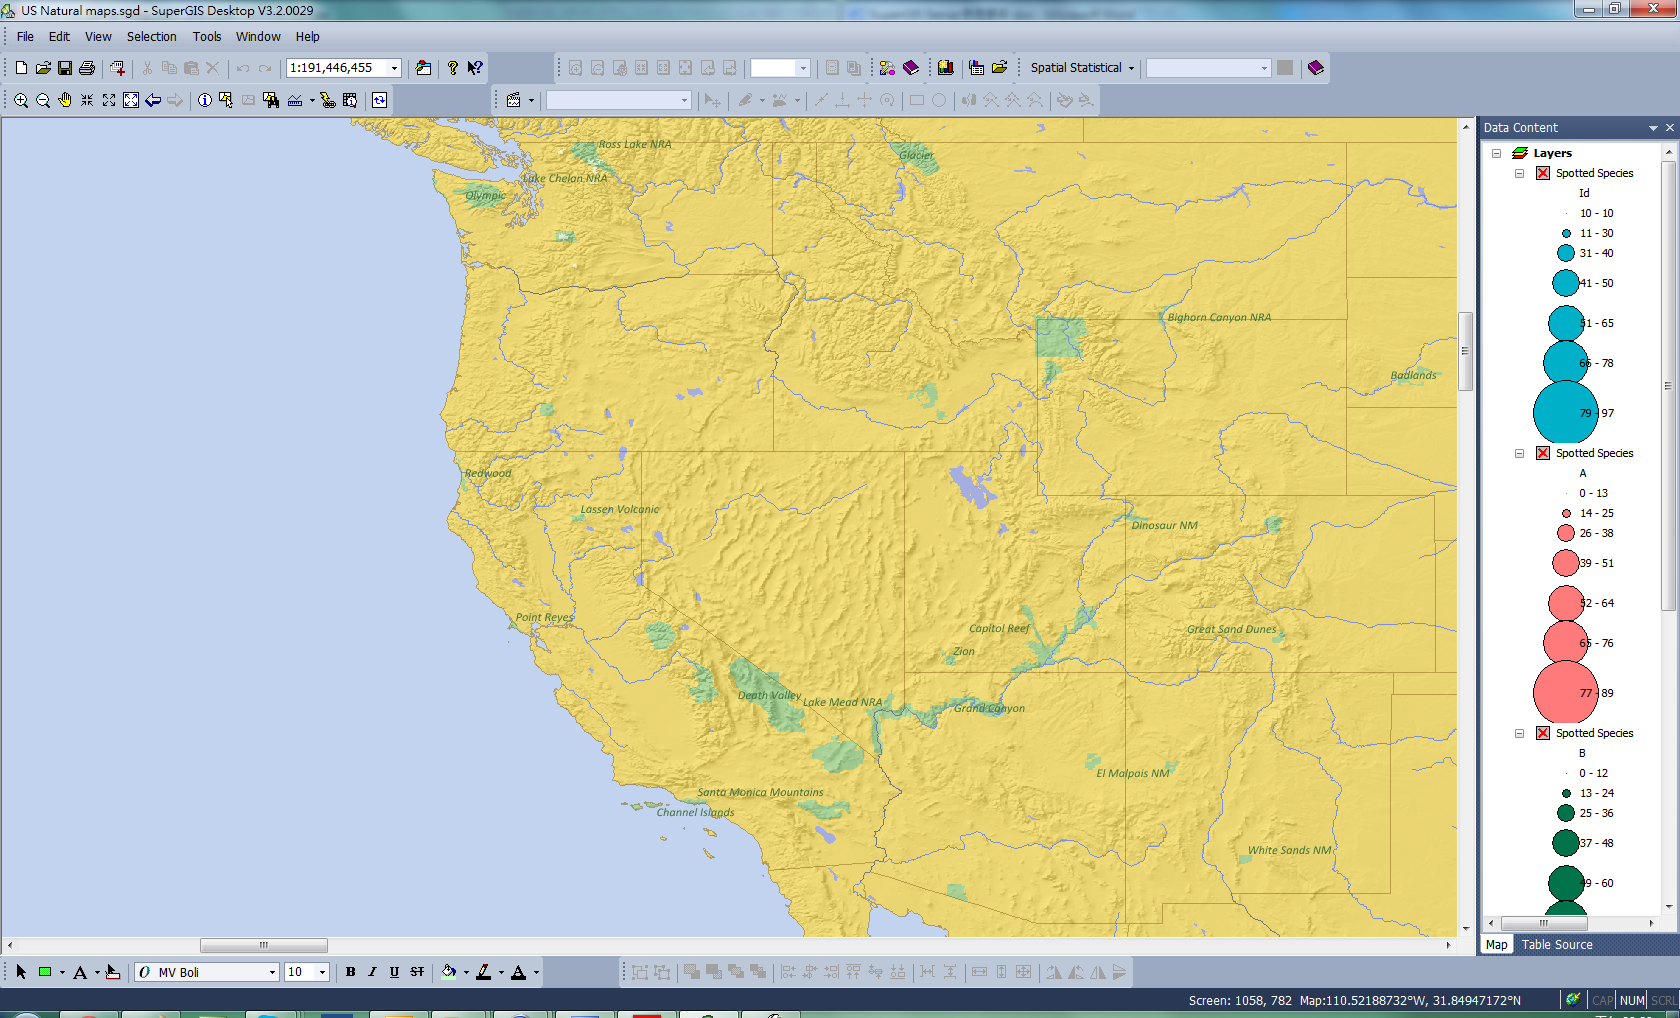
11. After the layers are added, you can directly set up the layers, such as symbol color or style, to meet your needs in SuperGIS Desktop.
12.After all the layers are set up, please right-click Layers in SuperGIS Desktop and click Export All Layers on the pop-up menu.
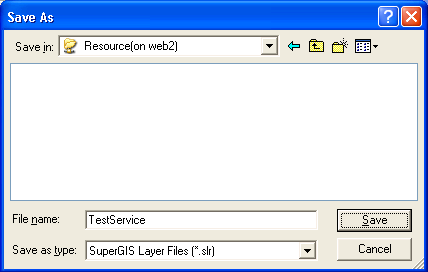
13.In the Save as window, directly enter the path that the Container is given with permissions to access to "\\web location\sharing\export file name", for example "\\WEB-RESOURCES\Resources\TestService.slr," it means the file "TestService.slr" should be saved to the Resources folder in the computer of "WEB-RESOURCES" through the web connection. Then please click Save.
To this step, the required documents for GIS map service are ready.
14.The map services are already stored to the shared file path you have set for server, and now we need to test whether the exported layer file can be opened in other computers. Open SuperGIS Desktop, right-click on Layers and click Import Layer File on the pop-up menu.
15.In the Open window, enter the web location and filename of .slr that you just created in File name. For example:"\\WEB-URCES \Resources\TestService.slr" and then click Open to open this .slr file.

16. After the file is imported, please check and try to manipulate the file, and ensure the properties you set can be normally read and interpreted.
17.When you want to add or edit the properties of a service in the Published Services tab of SuperGIS Server Manager, you can enter the .slr file path that you created by UNC path previously in the Document area of Service Properties window. And the shared map data will be acquired and added to the service.
18.If you are using SuperGIS Server Desktop Client to browse the published services, you will see the service name you just published but can't get the actual path of the data. Browse and click the GIS service that you want to use in SuperGIS Server Configuration window and click Add Layers. When the layer is added to the Layers in SuperGIS Desktop click Close to close the SuperGIS Server Configuration window.
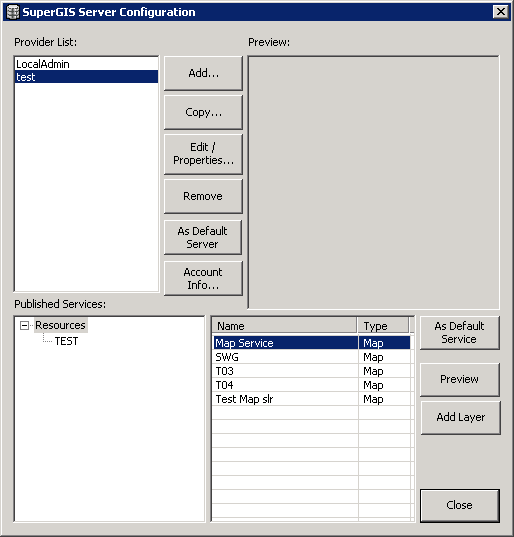
19. Now, you can query and analyze the SuperGIS Server service layer added in SuperGIS Desktop.
©2017 Supergeo Technologies Inc.