
Adding/Deleting Vertices
Modifying a feature means editing or reshaping an existing feature rather than adding a new feature. Therefore, the vertices of a feature might be changed. The operation of adding or deleting vertices of the existing features will be introduced.
•Adding Vertices
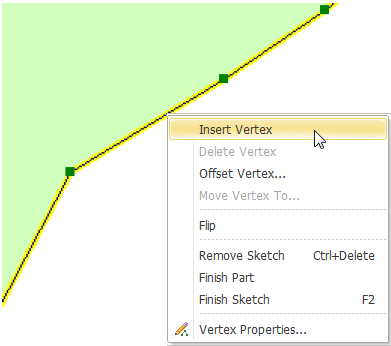
To add vertices, you can apply the command in the right-click menu or "Edit Vertex" window. Firstly, click "Start Editing" and "Select Features" tool. Then, click the drop-down arrow next to the "Add New Feature" tool and click "Modify Features." Click the feature you would like to modify; all the vertices of the feature will display. Then, you can move the mouse cursor over the edge and right-click. The menu is opened; click "Insert Vertex." A new vertex is added. The z value of the new vertex that you insert will be produced by interpolating the z values of its previous and next vertices in accordance with distance. As a result, the connecting line of the three points is a straight line in 3D space.
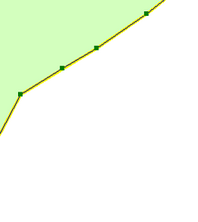
To finish editing vertices, you can click "Finish Sketch" or click the blank in Map Window. As all the vertices of the feature are not displayed, the editing is finished.
NOTE: After clicking "Start Editing", you can double-click a feature to start edit the vertices of the feature. The XYZ values of the vertex that you insert will be the XYZ averages of its previous and next vertices.
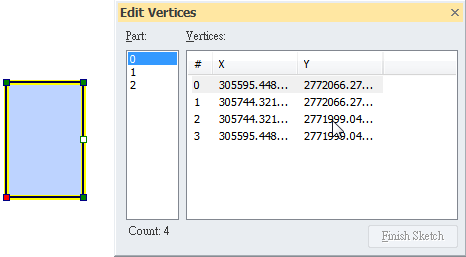
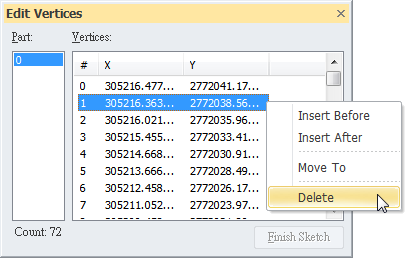
Additionally, you can also insert a vertex before or after a specified vertex by "Edit Vertex" window. First of all, select the feature you would like to insert vertices, and click "Edit Geography" button ![]() . "Edit Vertex" window is opened. In this window, you can select the vertex, and the selected vertex will be shown as a white point
. "Edit Vertex" window is opened. In this window, you can select the vertex, and the selected vertex will be shown as a white point![]() in Map Window. Then, you can figure out the sequence and direction of the sketch. So, you can check the vertex which is before or after the location you want to add a vertex. Afterward, right-click the vertex and click "Insert Before" or "Insert After", and a new vertex is added.
in Map Window. Then, you can figure out the sequence and direction of the sketch. So, you can check the vertex which is before or after the location you want to add a vertex. Afterward, right-click the vertex and click "Insert Before" or "Insert After", and a new vertex is added.
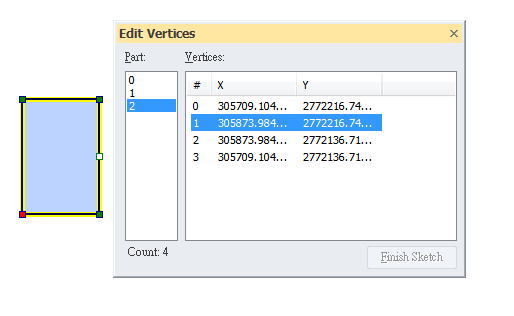
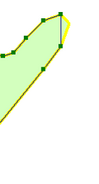
Take the feature for instance. If you would like to insert a vertex between Vertex 1 and Vertex 2, right-click Vertex 1 and click Insert After.
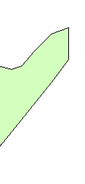
As the new vertex is added in Map Window, the coordinates of the new vertex is added in "Edit Vertex" window.
NOTE: "Insert Before" is unavailable in the right-click menu of the first vertex; "Insert After" cannot be used in the right-click menu of the last vertex. The XYZ values of the vertex that you insert will be the XYZ averages of its previous and next vertices.
•Deleting Vertex
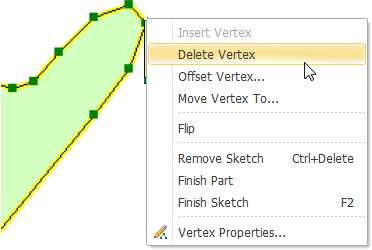
Firstly, click "Start Editing" and "Select Features" tool. Then, click the drop-down arrow next to the "Add New Feature" tool and click "Modify Features." Click the feature you would like to modify; all the vertices of the feature will be displayed. Then, right-click the vertex you want to delete, click "Delete Vertex" on the popup menu. The vertex will be deleted.
•Delete multiple vertices
Firstly, click "Start Editing" and "Select Features" tool. Then, click the drop-down arrow next to the "Add New Feature" tool and click "Modify Features." Click the feature you would like to modify; all the vertices of the feature will be displayed. Then, right-click a vertex of the feature and click "Vertex Properties." "Edit Vertex" window displays.
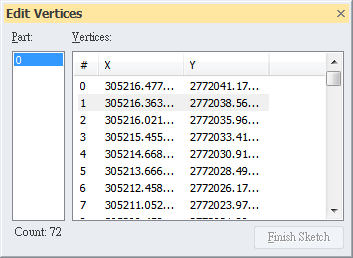
You can select the vertices in "Edit Vertex" window; the selected vertices will be shown as white points in Map Window. While selecting the vertices, you can press "Ctrl" key to select multiple vertices or press "Shift" key to select all the vertices within the range. Also, you can press "Delete" key to delete all the selected vertices. After editing, click "Finish Sketch" to save the changes. If you would like to cancel the changes, you can close the window directly or click "Undo" button ![]() .
.
©2015 Supergeo Technologies Inc. All rights reserved.