
Setting the Path for the Layer
While saving a project file, SuperGIS Desktop 10 will save the relative path of all layers in the map project . For example, you can store all the layers and the save the map project in the same folder so that the project file can always find the path of all layers even if the folder is moved to other hard drives. However, if you open the project files saved from SuperGIS Desktop 3.1a, the layers whose file path have been changed will not be displayed. In "Data Content", the mark in front of the layer name ![]() will be
will be![]() , which means the layer is lost. However, you can rewrite the path in Layer Properties window to solve the problem.
, which means the layer is lost. However, you can rewrite the path in Layer Properties window to solve the problem.
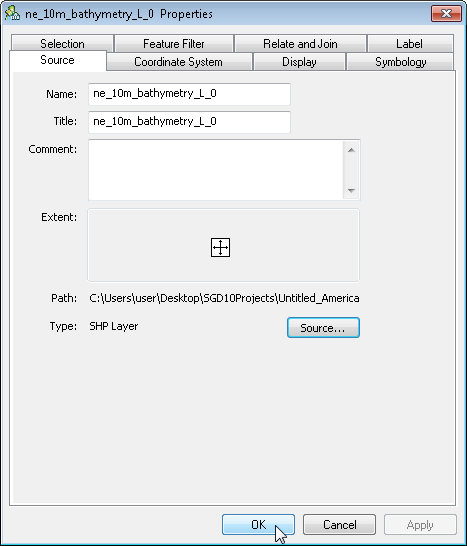
1. Firstly, in "Data Content", right-click the layer which is lost and choose "Properties." Then, Layer Properties window shows up.
.png)
.png)
2. Click "Source", and "Add Layer" window appears. Choose the file you need and click "Open."

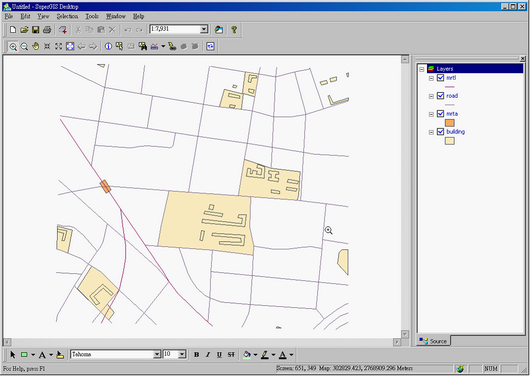
3. Back to the Layer Properties window, click "OK" to make sure the Path. And the path setting is completed. The map with a lost layer(the map below):
4. As the path setting is finished, the map and the mark in "Data Content" will be displayed correctly.
NOTE: If the layer lost is caused by the layers moved in a project (the layers are moved to the same folder), you can modify the path of one of the layer. Then, the system will be able to find the other lost layers in the same path. If the layers are found, the paths will be modified automatically.
©2015 Supergeo Technologies Inc. All rights reserved.