
Buffering
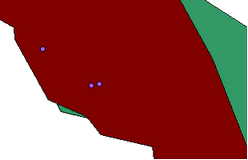
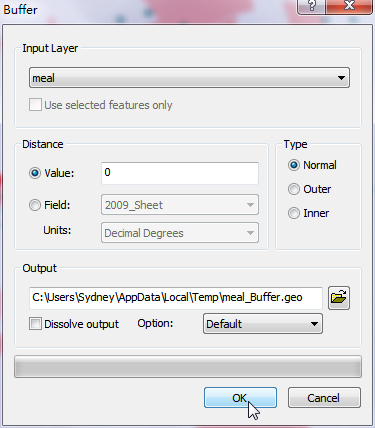
Take the point layer “meal” for example. You can perform buffer on the selected features or all features of the layer. For the specific features, please select the features you need on the map first. Then, open "Buffer" window and choose the needed layer in "Input Layer." Since this sample is to buffer the selected point features, please tick "Use Selected Features." Then, you can choose "Value" or "Field." Here, we choose Value and type 50 for the distance. After confirming the path for saving Output Layer, you cam choose whether to tick "Dissolve output." Here, we do not tick "Dissolve Output", so the attribute data of the new layer will be corresponding attributes of the input layer.
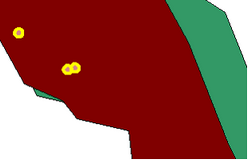
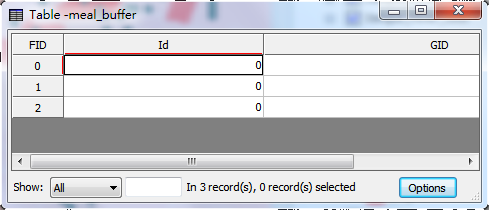
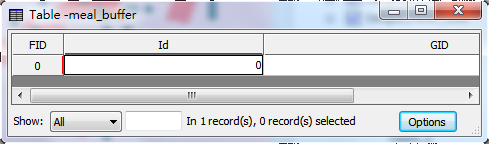
The new buffer layer will be added to the map window and placed as the top layer. Like the figure below, since "Dissolve Output" is not ticked in buffering, the attribute table includes 3 records.
If "Dissolve Output" is ticked in buffering, the attribute table of the new layer will dissolve all of the buffered features as a record.

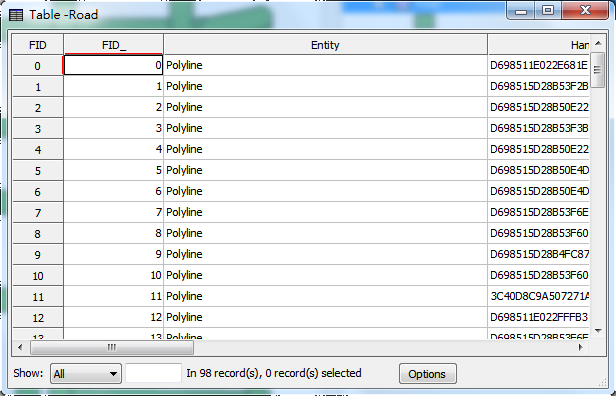
Take the polyline layer, “road”, for example. Open "Buffer" window, select “road” for Input Layer. Since we do not select any features on the map, "Use Selected Features" function is unavailable. Then, to set the distance, you can choose "Value" or "Field." Here, we choose "Value" and type 10 for the distance. Due to polyline layer, we can only choose "Normal" type for buffering. After confirming the path for saving Output Layer, you can choose whether to tick "Dissolve Output." This sample does not tick "Dissolve Output." The figure below is the line features before being buffered.
.png)

The buffered line features are displayed below. Because "Dissolve Output" is not ticked in buffering, the attribute data of the new layer will be the corresponding data of the input layer.
.png)
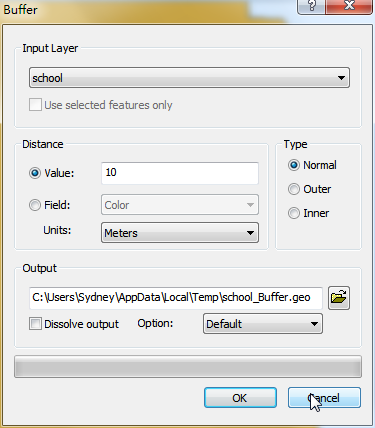
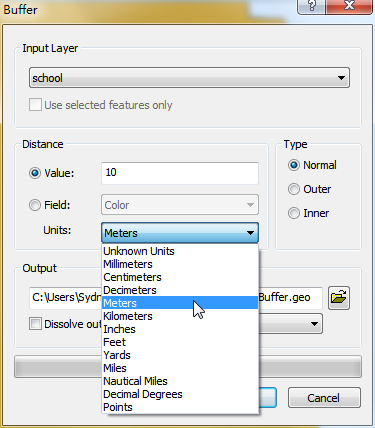
This sample is the polygon layer, “school”. We take a polygon feature for example. So, please select a polygon feature on the map first. Then, open "Buffer" window. Choose “school” in the "Input Layer" drop-down menu and tick "Use Selected Features." To set "Distance", you can choose "Value" or "Field." Here, we choose "Value" and type "10" for the distance. Since the feature is polygon, we can choose "Normal", "Outer", or "Inner" for the type of buffering. After confirming the path for saving the output layer, you can choose whether to tick "Dissolve Output." Here, we do not tick "Dissolve Output."
The four figures below are the features before being buffered, buffered with "Normal" type, with "Outer" type, and with "Inner" type. "Normal" type is to create a new feature from the original feature at a specified distance. Therefore, the new feature covers the original feature (The dotted line is the area of the original feature; the dotted line will not show in manipulation). "Outer" type is to create an outward polygon feature from the boundary of the original feature at the specified distance, so it does not include the original feature. "Inner" type is to create an inward feature from the boundary of the original feature at a specified distance.
_new.png)
Note: The default setting in the drop-down menu of “Unit” field is the same as the unit of “Layer Set”. While the unit of layer set is “Degree”, the default setting of this “Unit” field will be “Degree”, too; and the value in the “Unit” field cannot be modified by users. However, except “Degree”, users can modify other unit values like “Millimeters” or “Inches” according to their requirements. Subsequently, Desktop will automatically transform value based on unit and on the specified values users entered, and then execute buffer expression.
©2015 Supergeo Technologies Inc. All rights reserved.